Office: (404) 975-4800

Bridgette

drivers knee

Drivers Knee

drivers knee

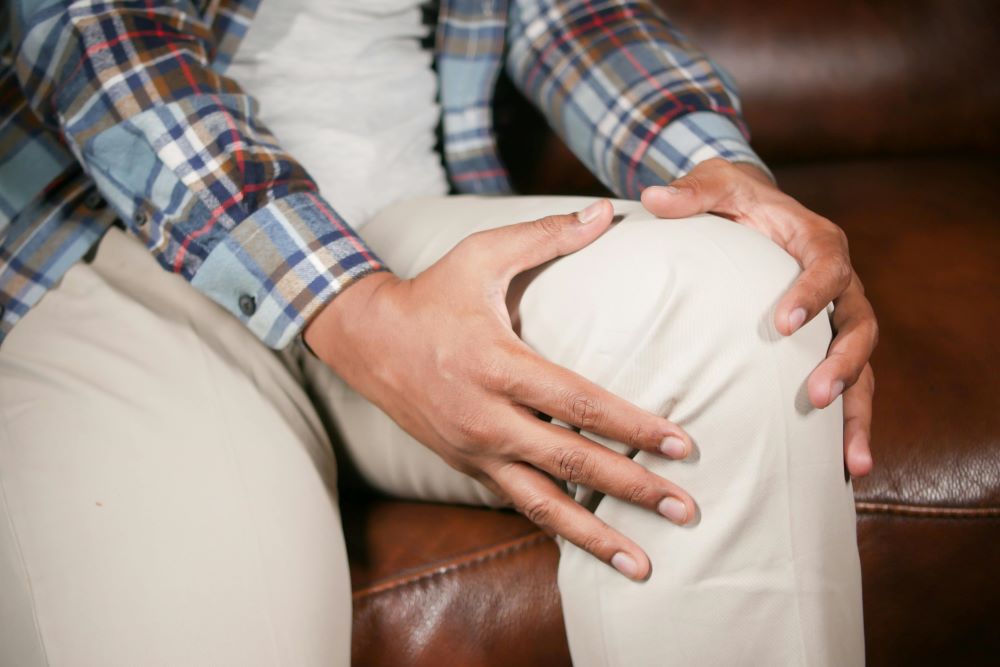
Drivers knee is among the most common musculoskeletal conditions affecting professional drivers. It starts as a mild ache on the knee, then gradually turns into a sharp cramp before becoming a persistent stabbing pain that limits knee function.

If you’ve experienced knee pain while driving or after getting out of your vehicle, it could be more than just discomfort. In this guide, we’ll cover the causes and symptoms of “driver’s knee” and offer steps to relieve and prevent it, helping you stay pain-free throughout your truck driving career.

What is Drivers Knee?

Driver’s knee, also called trucker’s or gas pedal knee, is caused by inflammation of the patellar tendon, which connects your kneecap to your shinbone. This leads to knee pain that worsens over time and can eventually make everyday movements like standing, climbing stairs, or driving difficult.

Medically known as patellar tendonitis or patellofemoral pain syndrome, it’s considered a repetitive use injury, meaning the pain builds gradually without a specific incident. Various factors contribute to this condition, but the key is understanding and addressing it early to prevent further discomfort.

Causes of Driver’s Knee

Several factors contribute to the occurrence of jumper’s knee in professional truck drivers, especially long-distance drivers. Some of these include:

  • Overuse. Driving for long periods requires repetitive pedal work. Constantly pressing the accelerator and brake can strain the patellar tendons and muscles around your knee, leading to pain and inflammation.


  • Poor posture. Maintaining a poor posture when driving, such as sitting too close to the wheel or slouching, increases the strain on your knee joints, causing pain.


  • Limited movement. Sitting behind the steering wheel in the same position for several consecutive hours can reduce blood flow to your legs. This leads to stiffness and pain.

drivers knee 2

  • Lack of exercise. Inadequate physical activity or not performing exercises that strengthen the muscles supporting your knee joints increases your likelihood of developing knee conditions, including drivers knee.


  • Incorrect driving techniques. Foot positioning while driving is crucial. Repeatedly using your left foot for braking in automatic cars or keeping it on the clutch in manual vehicles can cause knee pain.


  • Poor footwear. Driving in high-heeled shoes or those without enough support alters pressure distribution when operating the pedals, causing strain on the knees.


  • Underlying medical conditions. If you have a pre-existing medical condition affecting your knees, such as rheumatoid arthritis, osteoarthritis, or other previous knee injuries, driving for long periods can aggravate the pain.


  • Vehicle vibrations. Constant exposure to vehicle vibrations, more so in poorly maintained cars, often resonates through the seat, causing strain on your knee joints with time.

Symptoms of Drivers Knee

Because it’s a condition that develops over time, trucker’s knee manifests itself in various ways. Recognizing the symptoms in good time is crucial to its successful treatment. Here are the most common symptoms to watch out for:

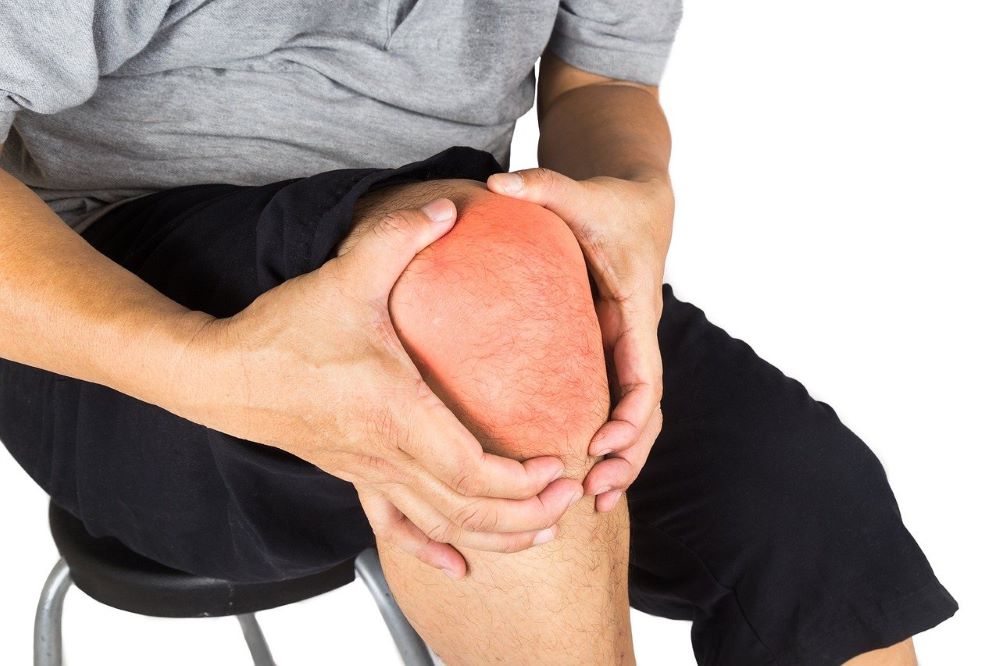
  • Localized pain. One of the earliest symptoms of driver’s knee is localized pain around your kneecap or at the front of your knee joint. The pain can be dull or sharp, and its intensity will increase, ranging from mild to severe.
  • Swelling. Visible swelling around the knee area, accompanied by warmth, is a sign of inflammation in your knees.
  • Stiffness. Moving your knee after long drives becomes challenging, indicating stiffness.
  • A popping or grinding sensation. You might hear a grinding or popping sound when you move your knee after driving.
  • Limited knee flexion. You’ll experience a limited range of motion on the affected knee.
  • Intense pain that aggravates when pressing the driving pedals.

drivers knee3

Treating Driver’s Knee

Knowing how to manage or treat knee pain from driving is essential since you’ll spend several hours behind the wheel throughout your trucking career. Some practical measures you can take to alleviate  knee pain successfully include the following:

Take a break

If you start noticing any of the symptoms above, take a break from activities that could worsen the injury and give your body time to heal. Avoid activities requiring rigorous knee movement, such as running, jumping, and climbing.

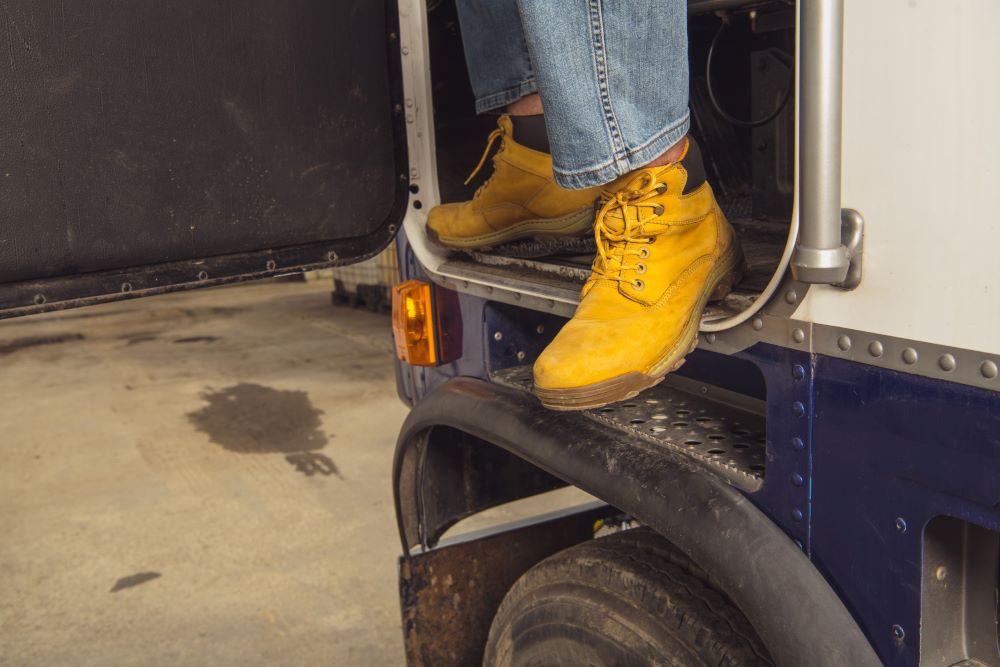
Wear supportive footwear

Invest in supportive and comfortable shoes that offer stability and enough arch support. It’ll minimize the impact of repetitive use of the pedals when driving.

Perform light stretches

Light stretches can help alleviate knee pain by improving blood circulation and promoting flexibility in the affected area. These stretches gently loosen tight muscles and reduce strain on the knee joint, aiding recovery and preventing further discomfort.

Use The RICE Method

RICE is an acronym for rest – ice – compression – and elevation. If you experience knee pain from driving, lie down after a long drive, ice the area for 15-20 minutes to reduce inflammation, then elevate your knee to relieve the discomfort.

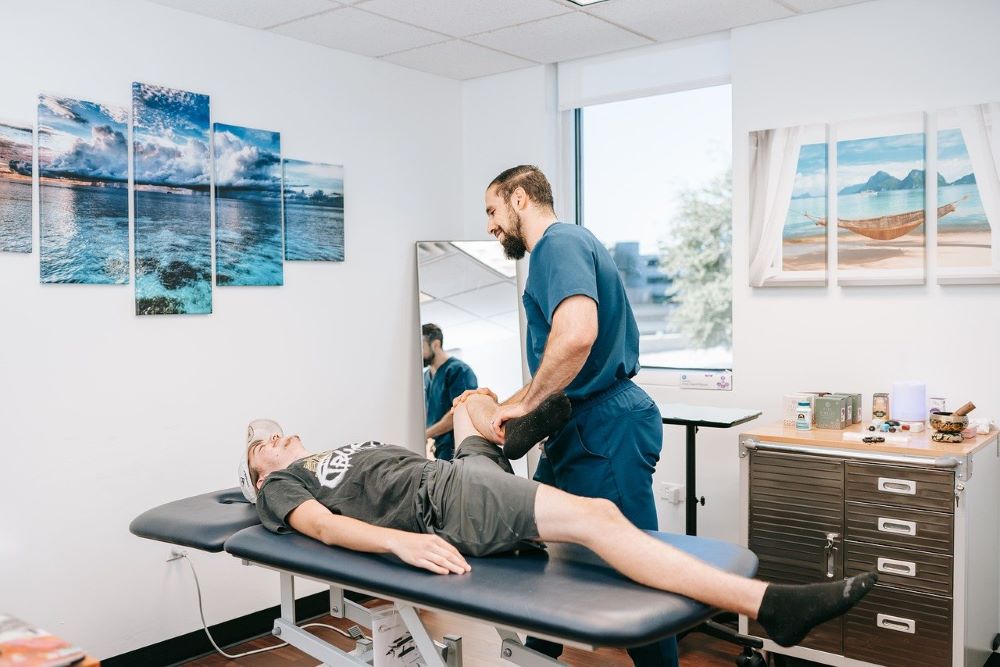
Seek out physical therapy

A physical therapist will massage the affected knee to ease the pain and create a plan to help you improve your knee health.

Consult a healthcare professional

If the pain persists or intensifies, seek medical advice from your doctor. They might prescribe pain medication or recommend appropriate treatments tailored to your situation.

Tips for Preventing Drivers Knee

Once you recover from patellar tendonitis, consider taking additional measures to strengthen your knees and prevent reoccurrence. This requires making healthy life adjustments and prioritizing your knee health. Below are some tips to help you with this:

truck drivers knee

Frequent Breaks

Take frequent short breaks, preferably every 1-2 hours, and stretch your legs to remove any tension on your knee joints, reduce stiffness, and improve flexibility. Take a short walk or perform light stretches.

Make ergonomic adjustments

Make the correct ergonomic adjustments to keep your spine neutral and reduce knee strain. For this, you can:

  • Adjust your driver’s seat or replace it with another designed to offer maximum back support and ensure proper positioning when driving. Check out our guide on the best seats for semi-truck drivers for suggestions.
  • Use additional seat cushions with adequate padding to distribute pressure evenly throughout your body. Here are our suggestions on the best semi-truck seat cushions.

Fix Foot Pedal Placement

Ensure your foot is in a natural position when pressing and releasing the pedal. You want to avoid excessive angling and maintain a proper knee alignment to minimize knee strain.

Do Regular Knee Strengthening Exercises

Regularly perform exercises that target strengthening the muscles around your knees, including leg presses, lunges, squats, and calf raises. Consider increasing the duration and intensity of your workouts to increase knee stability and minimize any risks of future injuries.

Doctor Checkups

Visit your doctor for regular checkups and personalized advice on maintaining your knee health and overall wellness as a truck driver.

Final Thoughts

If left untreated, drivers’ knee can progress into a severe medical condition referred to as chondromalacia patella, where the cartilage in your knees deteriorates, leading to large tears, increased pain, and potential mobility loss. To prevent this, early diagnosis is crucial.

Watch out for the signs and symptoms above, and try not to take too long to seek professional help if you notice or feel the signs.

For additional tips on maintaining your health and wellness as a professional trucker, visit our blog. You may want to start with these guides on staying fit and maintaining a healthy lifestyle.

freight accessorial

What Are Freight Accessorial Charges?

freight accessorial

Transporting goods involves more than simple pickup and delivery. Freight carriers often face challenges requiring additional services, such as extra labor, time, fuel, or special equipment, leading to freight accessorial charges.

This guide covers what these fees are, why they’re charged, the different types, and how to plan for them. It also offers tips for carriers to optimize their work and shippers to reduce costs by avoiding unnecessary fees.

What are Accessorial Charges?

In the transport and logistics industry, accessorial charges are fees freight carriers bill shippers for services that exceed the basics of moving goods from one point to another. These include any additional services required to complete load deliveries, such as:

  • Unpacking
  • Using liftgates
  • Covering non-commercial destinations
  • Inside and residential pickups or deliveries
  • Fuel surcharges
  • Detentions
  • Appointment fees
  • Reweigh charges

Typically, the base rate does not include accessorial fees, freight carriers add them to the final bill for unexpected services.

However, some can be planned and included in the initial invoice. These fees are most common in less-than-truckload (LTL) shipments but can also apply to full truckload (FTL), small parcel, and intermodal shipments.

Reasons for a Freight Accessorial Charge

Freight carriers charge accessorial fees for several reasons. But they all fall under three major categories–equipment, in-transit, and administrative oversight.

  • Equipment: Accessorial fees apply when special equipment is needed for safe loading, delivery, or transport, especially if not arranged in advance. These fees cover the time spent adding and using the equipment.


  • In transit: In-transit accessorial charges cover extra labor needed after pickup, during transport, or at delivery. Fees may apply for redelivery, out-of-route miles, layovers, or limited access. The fee depends on how long the issue delays the shipment.


  • Administrative: a transportation provider can charge extra fees for administrative mistakes, especially bill of lading (BOL) errors. The accessorial fee charged usually covers the time taken to correct the mistake.

accessorial charges

Common Accessorial Charges

There are over 20 types of accessorial fees charged by freight transportation carriers. Understanding these charges is crucial to ensure you’re well-compensated for the services you provide as a carrier.

It’s critical for shippers to understand these charges so they understand the extra charges they may receive from a transportation provider and minimize them. Here are the most common accessorial charges worth noting:

Detention

A detention fee applies if a shipment gets held up for too long at the pickup or final destination after a truck driver shows up at the required time. Often, detention fees get charged per hour. They accumulate when the consignor or consignee takes their time to load or unload the trailer, and the driver has to wait onsite longer than the agreed time.

Truckers get paid per mile and have to work within specific hours-of-service regulations set by the Federal Motor Carrier Safety Administration (FMCSA). If they wait onsite for a long time, they lose income. Detention charges allow truckers to get compensated for any time lost during this waiting period. They can be between $50 and $75 per hour or more.

Layovers or Re-delivery

Layover and re-delivery fees are common accessorial charges. Layover fees apply when a load isn’t ready at the scheduled time, while re-delivery fees apply when a shipment must be delivered again.

Lack of equipment or route issues can cause delays, leading to productivity losses. These fees, typically ranging from $250 to $500, help offset those losses and vary based on the equipment used..

Truck Ordered Not Used (TONU)

A shipper can place a truck order and not use it. If this happens, and the truck order gets canceled after the pre-established cut-off time stipulated in the contract, TONU accessorial charges apply. These charges range from $200 – $600 or more for a specialized trailer order.

accessorial charges 2

Over-Dimensional (OD) Cargo

Over-dimensional cargo charges cover overweight, oversized, or over-length freight. These fees kick in if your freight exceeds the standard legal dimensions specified in various federal, state, and local government regulations.

Most states allow a threshold of 8ft 6 inches tall, 8ft 6 inches wide, 53ft lengthwise, and 80,000 pounds gross weight. You’ll have to get special permits to transport cargo above these dimensions. OD accessorial charges cater to the expenses of getting these permits and the premium charges of trucker expertise needed to transport OD cargo.

The exact costs you can charge as an OD accessorial charge vary based on several factors, including size of the cargo, transport distance and the states you pass through.

Tarp Charge

Tarp charges come into play if you’re moving goods on an open-deck trailer and must protect them from unexpected weather changes or other elements. Tarps are heavy equipment that takes time to incorporate. The charge compensates drivers since they won’t be earning during tarping.

Tarp charge cost estimates range from $100 to $150 but could be higher depending on the size of the cargo being tarped and weather, among other factors.

Re-consignment

Re-consignment charges apply when a freight’s final destination changes once the load is in transit. This may happen because the shipper provided an incorrect address or they prefer a new freight delivery destination.

The cost varies significantly depending on how far the new destination is from the initial one, but it follows the rate per mile established in the original quote.

Hazmat

It costs carriers more to move hazardous materials because the Department of Transportation requires the driver and equipment to meet specific requirements. Hazmat accessorial fees cover these costs.

These extra charges are added to the initial quote if the hazmat requirements are known. If not, they’re included in the final bill.

accessorial charges 3

Tanker Endorsement

According to FMCSA, truck drivers transporting large volumes of liquid loads (more than 1,000 gallons) in dry van trailers must have a tanker endorsement. Tanker endorsement fees cater to this requirement. It’s often included in the original quote if communicated upfront.

Excess Cargo Insurance

Moving some high-value loads requires cargo insurance that surpasses the industry standard of nearly $100,000 worth of freight coverage. Excess cargo insurance accessorial fee takes this into account. Its rates vary greatly based on three main factors:

  • Type of commodity
  • Number of miles the freight needs to go and the lanes used
  • Value of cargo

Special Equipment

Special equipment charges cover the costs and labor of adding specialized equipment to protect cargo during transport and delivery.

The equipment can be excess straps in van trailers, edge protectors mainly on open-deck trailers, blankets, pad wraps, load bars, dunnage, decking, and pallet jacks. Special equipment costs vary based on the type and number of equipment required.

Out-of-route Miles

These charges apply if a transportation provider offers additional services that take more than ten miles beyond the contracted rate.

Stop-off Charge

Stop-off charges come into play if the load has to be delivered to more than two locations. The carrier has to make several stops to pick up or deliver goods to multiple destinations.

Driver Assist

Loading or unloading a trailer is beyond a carrier’s overall job duties. If a truck driver has to assist with these services, they charge for the additional labor separately. Driver assist charges vary according to the services offered.

For instance, asking a trucker to carry a pallet jack to a truck’s back end might fetch a lower fee than asking them to unload the shipment by hand and move goods inside a building.

accessorial charges 4

Lumper Fees

Instead of truckers performing the loading or unloading duties, most large distribution warehouses hire well-trained third-party laborers, often called lumpers, to do the work. Carriers pass the lumper fees on to shippers.

Fuel Surcharge

Fuel surcharges appear on almost 93% of freight transportation bills. They offset the rising fuel prices. For this accessorial fee, billing occurs at a variable rate following the weekly updates on the Energy Information Administration (EIA)’s website.

How to Avoid Paying Extra for Accessorial Fees

While most accessorial fees are unavoidable, there are some steps shippers can take to minimize these extra costs and lower shipping costs. A few of these include:

  • Automation. Automating shipping execution limits human errors and improves accuracy in shipping process compliance. It prevents administrative errors, such as incorrect classifications or bill of lading mistakes, lowering accessorial charges.


  • Prioritize end-to-end shipping visibility. Doing this helps to identify and mitigate issues. End-to-end shipment visibility generally involves anticipating the equipment required for a shipment loading and unloading, coordinating delivery and unloading times with the receiver, and limiting any additional fuel or time spent on each trip.


  • Double-check shipment details with a carrier. Confirming the accuracy of shipment information with a carrier, particularly the precise size, weight, and other legal dimensions when booking a shipment, can minimize accessorial costs.

Final Thoughts

For freight carriers, accessorial charges provide extra revenue, but for shippers, they increase costs. While shippers can reduce these fees, carriers must understand the supply chain to plan and bill accurately, ensuring fair compensation. This includes knowing the shipper’s facilities, the products, and the receiver’s logistics..

For more information about the transport and logistics industry, including how it works and ways you can navigate its systems profitably, visit the Mission Financial Services blog.

lumper

Lumper Fees: What Are They? 

lumper

Lumpers play a vital but often misunderstood role in the trucking industry, with many truck drivers having mixed views on their services. But understanding lumper fees early can save you money and frustration at the delivery site.

A lumper fee is the charge for hiring third-party workers to unload freight at a warehouse or distribution center when a truck arrives.

If you’re new to trucking, this article explains what lumpers do, why they’re important, and how they can streamline your operations. We’ll also discuss lumper fees so you’ll know what to expect when using their services.

What Is a Lumper?

A lumper is a worker responsible for unloading freight when a truck arrives at a warehouse. Typically hired by carriers, shippers, warehouses, or freight brokers, they provide the expertise and labor to handle large volumes of freight daily.

Lumpers are usually well-trained in offloading, pallet splitting, and securely moving cargo. They also understand the complexities of working in large warehouses and are skilled in using equipment like hand trucks, pallet jacks, and forklifts to unload cargo efficiently.

In many cases, lumpers are employed through lumper companies that act as a third-party services for food warehousing companies and grocery distribution warehouses.

benefit of lumpers

The Role of Lumpers in the Supply Chain

When a commercial truck arrives at a warehouse, lumpers take over the unloading process, freeing truck drivers from that responsibility. They offload the cargo, break it into pallets, verify it against packing slips, and organize it in the warehouse.

In return, they charge a fee, known as the lumping fee. This service helps speed up the shipping process and improves supply chain efficiency by taking on a task that would otherwise fall to truck drivers.

At many warehouses and distribution centers, you’re not allowed to unload your own freight. The facility may require a warehouse lumper or third-party lumper service because they want trained labor on the docks and clear accountability if cargo is damaged or someone gets injured.

Lumpers are commonly found in grocery and food warehouses, where their role is crucial. Since much of the cargo is perishable, quick and careful unloading is essential in the food supply sector.

The Benefits of Using Lumpers

Lumper services exist for one reason: they keep freight moving through high-volume warehouses without making drivers responsible for dock labor.

When a facility relies on a third-party lumper service, the benefits usually show up in safetyand cost control.

  • Drivers avoid dock labor and reduce injury exposure: You still check in, handle paperwork, and manage the appointment, but lumper workers handle the manual labor of unloading freight. That matters because injuries on the dock can trigger medical costs and insurance claims.
  • Faster, smoother unloading at busy facilities: Lumpers often work the same warehouse or distribution center every day, so they know the process, the staging rules, and the equipment flow. That familiarity can reduce delays at loading docks and help you stay on schedule.
  • Less cargo damage and cleaner accountability: Experienced lumpers know how to handle mixed pallets and perishable or frozen cargo without crushing product or breaking packaging. When trained dock laborers load and unload freight, it can also reduce disputes tied to damage claims and chargebacks.
  • Lower labor overhead for the facility or carrier: Outsourcing unloading helps companies avoid direct staffing costs. These costs can include payroll taxes and workers’ compensation insurance, as well as the overhead of hiring and training dock labor.

lumpers

What Is the Average Lumper Fee?

On average, lumper fees range between $100 and $500 per load.

Fees vary based on load size, type, and complexity (e.g., sorting, palletizing), with some jobs exceeding $500 to $1,000 in more extreme cases.

In most cases, lumper fees are paid upfront at the warehouse lumper desk. Payment methods may include cash, checks, lump-sum advances, or digital payment solutions.

After payment:

  1. Obtain a detailed lumper receipt
  2. Submit fee receipts to your carrier or freight broker
  3. Receive reimbursement according to company policy

Make sure you ask for a lumper receipt to receive reimbursement for any lumper fees paid. Lumper receipts act as proof of payment, indicating you qualify for reimbursement from your trucking company.

Factors Affecting Lumper Fees

Lumper fees vary depending on several factors. Understanding these factors as a commercial truck driver is crucial because it will help you negotiate a fair rate.

Some of the key factors affecting lumper fees include:

  • Type of freight: Delicate, perishable, hazardous, or frozen cargo usually requires more labor and care, which increases lumper fees.
  • Volume of cargo and pallet count: More pallets or floor-loaded freight requires more labor than palletized loads.
  • Time required to unload: Most lumpers work at an hourly rate, so longer unloading times increase lumping fees.
  • Time of day: Unloading during peak hours often costs more due to limited warehouse staff availability.
  • Additional services: Extra services like pallet sorting or special handling instructions can add additional fees.

Lumper Fees vs. Paying Driver

According to lumping regulations–Title 49 of the U.S. Code (49) U.S.C. §§ 14103 (a) and 14103 (b), it’s illegal for any trucking company to force their truck drivers or carriers to unload via a lumper service without being reimbursed.

Also, a truck driver or carrier must be reimbursed if they unload their freight.

Most trucking companies choose lumper services because they reduce injury risk, avoid liability from unsafe warehouse conditions, and simplify trucking operations.

Reimbursement policies can vary, so always confirm lumper fee reimbursement terms on the rate confirmation before accepting the load.

lumpers fees

How To Avoid Surprise Lumper Fees As A Truck Driver

Lumper fees usually aren’t the problem. The surprise is paying them without knowing the rules or what paperwork you’ll need to get reimbursed.

Use this quick checklist before you accept the load and again when you arrive.

  • Ask if lumpers are required before you accept the load: Don’t assume you can unload your own freight. Some food warehousing companies and grocery distribution warehouses require a third-party lumper service, and the receiver won’t give you an option.
  • Confirm who pays and how reimbursement works in writing: Check the rate confirmation for reimbursement terms, including whether the trucking company or freight broker reimburses you directly and how fast they pay lumper fees back.
  • Ask if reimbursement has a cap: Some carriers only reimburse up to a set amount. If you don’t confirm the cap, you can end up covering the difference out of pocket.
  • Verify what documentation is required: Many carriers need a lumper receipt that includes the warehouse or distribution center name, load or trailer number, date, and amount. Ask whether they also need a signed BOL note, a fee receipt, or a reference number.
  • Bring a payment method that works at that facility: Lumpers often require payment at the desk, so unloading can start. Some locations use lumper advances, Comchecks, or electronic payments. If you show up without an accepted payment option, you can lose your delivery window.
  • Scan or photograph receipts immediately: Save the lumper receipt and any payment confirmation before you leave the dock. If you wait until later and the receipt gets lost, reimbursement can stall.

Planning ahead protects your cash flow and keeps your delivery schedules from sliding.

Lumper Fees vs Detention vs Layover

These charges get mixed up all the time, and that’s how drivers lose money. Each one pays for a different problem, and you need to label it correctly so your carrier processes it fast.

  • Lumper fee: A charge for loading/unloading freight using lumper workers at a warehouse or distribution center.
  • Detention: Pay for waiting beyond the set period at the receiver or shipper. This is about time lost at loading docks, usually tracked by appointment time, check-in time, and release time.
  • Layover: Compensation when delays push you into an overnight or full-day situation, and you can’t reasonably move to the next load. This is about a schedule disruption that extends beyond normal detention.

When you separate the accessory charges correctly, you invoice cleanly, attach the right documentation, and improve your odds of getting reimbursed without delays.

Worker loading pallet with a forklift into a truck

Frequently Asked Questions

Who Typically Pays The Lumper Fee?

Usually, the driver pays the lumper fee upfront at the warehouse or distribution center, then submits the lumper receipt for reimbursement. Most carriers or a freight broker will reimburse lumper fees paid, but policies vary, so confirm the process on the rate confirmation.

Are Lumpers Required At Some Warehouses?

Yes, some warehouses require lumpers, especially food warehouses and grocery distribution warehouses. These facilities use lumper services due to labor rules, insurance requirements, and liability concerns around loading and unloading freight.

Can A Driver Unload Instead Of Paying A Lumper?

Yes, you can unload freight yourself, but many facilities won’t allow it. Always ask before you arrive or at check-in, because unloading rules depend on the warehouse lumper policy and the delivery site.

What Should Be On A Lumper Receipt For Reimbursement?

Your lumper receipt should list the provider name, date, amount, and load or trailer number. Clear fee receipts make reimbursement faster and reduce disputes when you submit lumper payments to the trucking company or broker.

Are Lumper Fees Tax-Deductible For Owner-Operators?

Yes, lumper fees can be deductible as a business expense for an owner-operator. Keep the receipt and payment record, then confirm how to file it with a tax professional based on your setup.

Conclusion

Lumper fees are a routine part of the logistics industry, especially when delivering to food warehouses and high-volume distribution centers.

While lumping services adds an extra step to the unloading process, they help keep freight moving efficiently and reduce risk for truck drivers and companies.

Understanding how lumper fees vary, how the payment process works, and how to receive reimbursement helps you protect your cash flow and stay focused on running profitable trucking operations.

Unexpected lumper fees and other delivery costs can tighten cash flow fast, especially for owner-operators.

At Mission Financial Services, we help truck drivers and small fleets access commercial vehicle financing that accounts for real-world expenses. If you’re planning your next truck purchase or upgrade, we’re here to help you move forward with confidence. Get in touch or start your credit application today.

pre trip inspection

Pre-trip Inspection Checklist For Truck Drivers 

pre trip inspection

Conducting pre-trip inspections is essential for your safety as a truck driver and the safety of all road users. That’s why the Federal Motor Carrier Safety Administration (FMCSA) provides pre-trip inspection checklist standards all commercial driver’s license (CDL) holders must adhere to before hitting the road.

Usually, meeting FMCSA’s pre-trip inspection standards involves a few steps and might take approximately 10 -15 minutes minimum. If you’re wondering what a pre-trip inspection checklist is and why it’s important, read on to learn more.

What is a Pre-Trip Inspection Checklist?

The Department of Transportation (DOT) pre-trip checklist is an essential tool for Class A and Class B commercial driver’s license (CDL) holders to review before operating their vehicles. It is a guide to help you inspect various parts of your commercial vehicle and ensure it’s in proper working order before heading out.

The specific items on a pre-trip checklist can vary depending on the type of commercial vehicle and its intended use. For commercial trucks, the checklist covers nearly all components, accessories, and systems, including the truck, trailer, and cargo.

For Class A CDL holders, the checklist focuses on towing systems, such as the trailer parking brake and coupling areas, and typically extends to the trailer, flatbed, or other towed items. In contrast, the Class B CDL checklist emphasizes systems and parts for non-towing commercial vehicles.

Both Class A and Class B checklists share common items, including checks for brake lights, oil levels, front and rear suspension, and minimum brake pad thickness, among others.

inspection checklist

Importance of a Pre-Trip Checklist?

A thorough inspection checklist streamlines the pre-trip process, ensuring careful and consistent vehicle assessments without missing details. It also simplifies completing required inspection reports, which is crucial for several reasons:

  • Safety–well-performed pre-trip inspections help you identify potential mechanical issues early. Detecting and resolving mechanical problems in time ensures your truck is safe to drive. It also minimizes delays from unexpected vehicle breakdowns.


  • Compliance–FMCSA provides specific vehicle inspection regulations commercial drivers must follow to ensure their vehicles are in peak condition for maximum road safety. Failing to comply with these regulations or performing incomplete pre-trip inspections might lead to penalties and affect your Compliance, Safety, and Accountability (CSA) score.

Low CSA scores can increase insurance premiums, leading to high operating costs.

  • Maintenance– routine pre-trip inspections ensure proper vehicle maintenance. You’ll prolong the vehicle’s lifespan and avoid costly repairs later.


  • Company reputation–proper adherence to all federal inspection regulations demonstrates your commitment to safety and professionalism. It leaves a positive impression on customers and other industry stakeholders, boosting your company’s reputation.

What to Include on a Pre-Trip Inspection Checklist

Commercial trucking companies may prepare their own pre-trip inspection checklist, adding their expectations and twists to the pre-trip inspection procedure. However, all processes must follow the federal pre-trip inspection checklist criteria.

A standard legal pre-trip inspection procedure should include the following steps and elements.

pre trip inspection 2

Step 1: Examine The Engine Compartment

Examining the engine compartment involves assessing the condition of various components. These include:

  • Fluids–Check the oil and power steering fluid levels using a dipstick to ensure all fluids, including oil and coolant, are at the proper levels. Inspect hoses and reservoirs for leaks, and look beneath the truck for any fluid stains, which could indicate leaks of fuel, oil, coolant, or brake fluid.


  • Belts–thoroughly inspect all belts for pumps, alternators, and compressors to ensure they have no cracks or frays. Also, confirm they’re in place, giving no more than half an inch of play.

Other components to pay close attention to and ensure they’re securely mounted and in excellent condition inside the engine compartment include:

  • Air compressor
  • Radiator
  • Alternator
  • All pumps, including the water pump and power steering pumps
  • Wiring

Step 2: Inspect the Front Parts of Your Commercial Vehicle

Front-of-vehicle inspection checklist items often include checking parts of your steering equipment, such as:

  • Steering box–check the steering box to ensure it is intact. All connected hoses must be properly mounted without any power steering fluid leaks.
  • Steering column or steering shaft–this should be straight.
  • Drag link–check whether the rubber is well-greased and uncracked.
  • Tie rod plus control arms–both must be straight.
  • Pitman arm–confirm if all the caste nuts and cotter pins are present and secure

Step 3: Check The Front Suspension Systems

This includes examining the following parts:

  • Spring mounts and hangers–ensure the spring mounts hold all spring hangers securely in position. Look for signs of cracks, wear, or breakage that might compromise their performance.
  • Shock absorbers–check for splits, leaks, or dry rot within the rubber. Focus more on the sections where the top and bottom parts overlap because most leaks occur here.
  • U-bolts–confirm if all bolts are secure and tightened around the springs and axle.

pre trip inspect

Step 4: Inspect the Brake System

Your commercial vehicle’s brake system is one of its most essential parts. Take your time to examine the entire brake system and perform several brake tests as outlined below:

  • Brake linings and pads–the brake pad’s minimum thickness should be a quarter of an inch. Also, examine the linings for any debris.
  • Air brake hose–ensure the line is properly connected and has no cuts or splits. You also want to confirm there is no air leak from the hose.
  • Brake chamber–the brake chamber must be sealed completely. There shouldn’t be any audible air leaks.
  • Brake drum–look at the color of the brake drum. If blue, it indicates excessive heat and might need further scrutiny.
  • Hand brake–your system’s push rod should have an inch of play (not more) on either side and stand at 90 degrees when pulled.

You may need to perform a 9-, 7-, or 5-step brake test to inspect all brake components accurately.

Step 5: Examine the Lights and Reflectors

Inspect your lights and reflectors to ensure they’re all in perfect working condition and are clear of debris. The pre-trip inspection checklist items you’ll have to go through here include:

  • High and low beams
  • Brake lights
  • Turn signals
  • 4-way emergency flasher function
  • License plate lights and running lights
  • Reflector and DOT tape–ensure these are clean

Step 6: Inspect the Mirrors and Windshield

For this step, be keen to check the following:

  • External mirrors plus mirror brackets–confirm if all external mirrors are clean and do not have any cracks or obstructions. They should also be attached to their mirror brackets firmly and well-adjusted to provide a proper rear view.


  • Windshield–there shouldn’t be any cracks more than one inch. Also, run your windshield wipers to ensure they work and check that you have adequate windshield washer fluid.

pretrip

Step 7: Conduct A Battery and Trailer Coupling System Check

This step involves inspecting the fuel tank, battery area, and trailer coupling system.

Ensure the battery is properly charged and that all key components, such as the exhaust system, suspension, electrical connections, and coupling mechanisms, are secure, undamaged, and free of leaks. Check that everything is in good working order before continuing.

Step 8: Check the Wheels and Tires

To perform wheel and tire inspections properly, check the inflation levels and examine the overall tire condition, particularly tread depth. Some of the most important sections you must pay attention to closely are:

  • Driver and steer tires–ensure the tire tread is even, and the minimum tread depth on drive tires is 2/32”, while that of steering axle tires is 4/32”. The treads and sidewalls shouldn’t have cracks, bulges, or abrasions.
  • Axle seals and hub seal–the axle seal and hub seal should be intact with no leaks
  • Wheel rims–there shouldn’t be any illegal welds or unauthorized repairs on the rims.
  • Dual spacing–ensure there’s enough space between any dual tires
  • Lug nuts and bolts–these components should be intact in their lug bolt holes.
  • Valve stem–confirm there are no audible air leaks in the valve stem.

Step 9: Inspect the Trailer

Inspect the trailer to ensure all key components, such as the headboard, doors, and mud flaps, are structurally sound and securely mounted. Check for any signs of damage, such as cracks, holes, bends, or missing parts, and ensure everything is intact and functioning properly.

Step 10: In-cab Inspection

Ensure all in-cab components are undamaged and functioning properly. This includes checking the steering wheel, seat belts, pedals, gauges, horns, fuse box, parking brake, heater, and defroster to confirm they are all in working order.

Step 11: Inspect the Rear of the Vehicle

Before connecting your truck to the trailer, inspect the rear end to ensure the brake chambers are undamaged, shocks and airbags are intact, and the driveshaft is clean, with no debris in the U-joints. Verify that the frame is sturdy, the fifth wheel is well-greased, and the fuel tanks are free of leaks.

Step 12: Check the Emergency Kit

Truck drivers must carry an emergency kit as required by DOT regulations, including a fire extinguisher, warning devices, and spare fuses. During your pre-trip inspection, confirm the kit is complete and functional, including items like warning flags, reflective triangles, a safety vest, first-aid kit, jumper cables, a flashlight, strobe lights, and extra batteries.

How often should I perform a pre-trip inspection?

According to FMCSA’s current regulations, all truck drivers must perform and log in at least one thorough inspection in their hours of service daily. The pre-trip inspection should happen before each haul. You must also complete an inspection report if you find any defects during your inspection.

Final Thoughts

Thorough pre-trip inspections and regular truck maintenance significantly reduce road accidents and enhance safety. By following the provided checklists, you can ensure your pre-trip inspections meet legal requirements.

For additional safety tips and to further improve your practices as a commercial truck driver, visit our blog. If you find defects that need immediate repair during your inspections, reach out to us for financing options. We offer affordable commercial truck repair loans to help you keep your truck in excellent condition without disrupting your business’s cash flow.


less that truck load

Complete Guide to LTL Freight

less that truck load

Whether you’re a small-scale owner-operator or run a large trucking fleet, there are many different ways that you can plan freight deliveries. LTL freight is a popular option to keep in mind.

In many cases, shipments don’t require an entire truckload. Instead of wasting empty space and driving empty miles, LTL freight is an option to help trucking businesses operate more efficiently.

In this guide, we’ll explore exactly what LTL freight is, how it works, and when trucking operators should consider this approach.

What is LTL Freight?

LTL Freight stands for “Less-Than-Truckload” freight. It’s a shipping method used when the amount of goods a business needs to transport doesn’t require a full truck.

Instead of renting an entire truck, multiple shippers share the same truck space. Each shipper pays only for the portion of the truck they use, which makes it more cost-effective for smaller shipments and more optimized loads.

LTL Freight typically involves shipments larger than parcel deliveries but smaller than what would fill a full truck. It’s ideal for businesses with shipments that weigh between 150 and 15,000 pounds.

Benefits of LTL Freight

For the right kind of shipments, LTL freight offers some clear advantages.

LTL Cost Efficiency

The most obvious benefit of LTL freight is that it’s a far more cost-efficient shipping method than using an entire truck that isn’t full.

Both truck drivers and trucking businesses can experience these cost savings.

LTL

For Small to Medium Businesses

LTL freight can help small and medium businesses save money if they don’t have enough products to fill an entire truck.

In traditional shipping, businesses might have to pay for an entire truck’s capacity, even if their goods only take up a fraction of the space. LTL freight allows them to share the truck space with other shippers, meaning they only pay for the portion they use.

Beyond this, being able to ship smaller loads more frequently helps businesses manage inventory levels better and respond more quickly to customer demands. All this without having the high costs of full truckload shipping.

For Truck Drivers

Instead of dedicating a truck to a single shipment, drivers can combine several smaller shipments from different customers into one trip. This maximizes the truck’s capacity, reducing the number of empty miles driven.

Fewer empty miles mean lower fuel costs and less wear and tear on the vehicle, which translates into higher overall efficiency and profitability for drivers.

LTL freight also allows carriers to offer more frequent routes and services, which can attract more customers and fill up more trucks.

LTL sustainability

Reduced Environmental Impact

LTL freight plays an important role in reducing the environmental impact of the trucking industry.

When multiple shipments are consolidated into a single truck, there is a reduced need for trucks to transport goods. This means lower fuel consumption, which decreases greenhouse gas emissions.

Consolidating truckloads also minimizes the overall miles driven by trucks, which is important as the industry looks for ways to become more sustainable.

Increased Flexibility and Accessibility

LTL freight offers a high level of flexibility and accessibility that can be particularly useful for businesses with varying shipping needs.

Because LTL carriers handle shipments from multiple customers, they often have a broader network of routes and services compared to full truckload carriers. These extensive networks allow businesses to reach more destinations, including remote or less-frequented areas, with no need to fill an entire truck.

LTL carriers also offer a wider range of service options, such as expedited shipping, time-specific deliveries, and residential pickups and drop-offs.

Having flexibility like this enables businesses to meet specific delivery requirements, such as tight deadlines or special handling needs. These specifics aren’t always possible with full truckload shipping.

Improved Inventory Management

LTL freight means businesses can ship smaller quantities more frequently, which is a great way to improve inventory management.

Instead of waiting to accumulate enough products to fill a truck, businesses can ship goods as they’re ready. This reduces storage costs and the risk of overstocking or under-stocking.

Improved Service Options

LTL carriers often provide extra services that can be tailored to the specific needs of businesses. These services might include things like liftgate service, inside delivery, freeze protection for temperature-sensitive goods, or specialized handling for fragile items.

These options make LTL freight a versatile solution that can accommodate a wide range of shipping requirements.

Risk Mitigation

With LTL freight, businesses can spread out their shipments rather than relying on a single large load.

This diversification reduces the risk associated with potential shipping delays, damage, or loss. If one shipment faces an issue, it only affects a small portion of the total goods being transported, which would minimize the impact on the business.

ltl forklift

Access to a Broad Carrier Network

LTL freight providers often operate within a network of terminals and hubs, similar to airlines.

This hub-and-spoke model allows for more efficient routing and delivery, even to multiple destinations. Businesses benefit from this extensive network, as it increases the chances of finding timely and cost-effective shipping solutions.

LTL Drawbacks

While LTL freight is a smart model for certain trucking requirements, it also comes with some disadvantages.

Longer Transit Times

One of the main drawbacks of LTL freight is that it typically involves longer transit times compared to full truckload (FTL) shipping.

Since LTL shipments are consolidated with other loads, the truck will probably make more stops along the way to pick up or drop off goods at different locations. Each extra stop adds time to the overall delivery process.

LTL shipments also often pass through several distribution terminals or hubs before reaching their final destination, which can also cause delays.

More Planning

LTL freight requires more planning and coordination than full truckload shipping. Because shipments are combined with those from other shippers, it’s important to plan the timing and logistics of the pickup and delivery meticulously to ensure everything runs smoothly.

Businesses need to provide accurate weight and dimension measurements for their shipments, as well as clearly label their goods to avoid confusion or delays while everything is consolidated.

Businesses may also need to coordinate with LTL carriers regarding specific delivery windows, special handling requirements, or other considerations. This creates an extra level of planning, which can be time-consuming and require plenty of extra attention to detail.

ltl truck

Increased Damage Risk

Since LTL shipments involve handling and transferring goods multiple times, such as when loading and unloading at various terminals, there’s a higher chance that items could be damaged in the process.

The more a shipment is handled, the greater the risk of it being dropped, mishandled, or exposed to bad conditions. And because LTL shipments share space with other goods, there’s a possibility that items could be stacked or placed in ways that aren’t ideal for their protection.

When Should You Choose LTL Over FTL?

Choosing between LTL and Full Truckload shipping should come down to a couple of factors, such as the size of your shipment, your budget, and your delivery requirements.

Here are some scenarios where LTL is the better choice.

Smaller Shipments

If your cargo is relatively small – typically weighing between 150 and 15,000 pounds and taking up less than 12 feet of trailer space. LTL is more cost-effective for small shipments.

Cost Efficiency

If keeping shipping costs low is a priority, LTL is often the better choice. In LTL shipping, you can ship more frequently without incurring the higher costs associated with FTL.

No Urgent Delivery Deadlines

LTL shipping is best when your delivery isn’t time-sensitive.

Because LTL shipments are combined with others and may make several stops along the way, they generally take longer to reach their destination compared to FTL. If your delivery schedule is flexible and you can afford a longer transit time, LTL is a more economical choice.

Flexible Shipping Needs

Flexible Shipping Needs

LTL offers more flexibility when it comes to shipping options. If your shipment has specific needs, like liftgate service, residential delivery, or inside delivery, LTL carriers often provide these additional services.

FTL shipping is more straightforward, moving a full load from point A to point B without the additional customization that LTL can offer.

Lower Risk Cargo

If your shipment isn’t highly valuable or fragile, LTL is a good option.

Since LTL involves multiple stops and transfers, there’s a higher risk of damage compared to FTL. However, if your goods are durable or not particularly time-sensitive, this may not be a major concern, which makes LTL a practical choice.

Multiple Destinations

LTL is a great option if your shipment needs to go to multiple destinations.

With LTL, you can send smaller quantities to various locations without paying for a separate truck for each destination. This can be a highly efficient and cost-effective way to manage distribution to different sites.

Final Thoughts

Implementing LTL freight can be an excellent way for businesses to ship smaller goods more efficiently. If you run a trucking business, then offering LTL freight services can also be a great way to open up new business opportunities and delivery routes. Whether you own a box truck or a large semi-truck, LTL is a useful way to fill up empty space and ensure you get more out of each delivery mile you drive.

If you’re considering starting a trucking business, then keep LTL in mind as an option to keep your business flexible. Of course, this all starts with having the right truck to manage LTL freight in the first place.

Contact Mission Financial Services for the easiest and most convenient way to secure financing for your new commercial semi-truck.

MC AUTHORITY

How To Get Your MC Authority

MC AUTHORITY

If you’re an owner-operator, you’ll know that having all the right licenses and documents is essential for smooth business operations. If you run an interstate trucking business, you’ll need to add MC authority to your list of documentation.

This is an important legal requirement, and it can help make your life a lot easier when operating interstate.

While almost all interstate carriers need MC authority, it’s essential to understand the different types of authority that exist and how to apply for the correct one. We cover everything you need to know about this in the guide below.

What is MC Authority?

MC Authority, or Motor Carrier Authority, is a crucial component for companies operating within the transportation industry, specifically those involved in interstate commerce.

It is a legal authorization granted by the Federal Motor Carrier Safety Administration (FMCSA), a division of the U.S. Department of Transportation (DOT), that permits businesses to transport goods or passengers across state lines for compensation.

This authorization is mandatory for any for-hire carrier engaging in interstate commerce, meaning that if a company wants to transport goods or passengers from one state to another, it must obtain an MC number.

Getting an MC authority involves registering with the FMCSA and meeting specific requirements, including having the right insurance coverage.

Once approved, you get a unique MC number, which your company uses to operate legally in interstate commerce.

As a trucking business, it’s easy to fall under the category that requires MC authority. If you ever cross state lines on delivery routes, then applying for MC authority is important.

interstate (3)

Types of Authority

Motor carrier authority falls under three main categories. Here’s a breakdown of each type:

  • Motor Carrier of Property (Except household goods): This authority lets companies transport general freight, like raw materials or finished products, but not household items. If you haul anything other than household goods for hire, you need this.


  • Motor Carrier of Household Goods: This is for moving companies that transport household items like furniture or personal belongings across state lines. If you’re in the moving business, this is the authority you need.


  • Specialized MC Authorities: These are for companies that transport specific goods that need special handling, like hazardous materials, passengers, or animals. For example, a company hauling chemicals needs HazMat authority, and a bus service needs Passenger Carrier authority.

Having the right authority is essential to operate legally, avoid penalties, and ensure your business runs smoothly.

Who Needs MC Trucking Authority (And Who is Exempt)

Quite simply, you need MC trucking authority if you transport goods or passengers for hire across state lines or within a state as part of interstate commerce.

If you’re a for-hire carrier moving freight like machinery, electronics, or other commercial goods, you need this authority.

However, some carriers are exempt. If you only haul exempt commodities like unprocessed agricultural products, and certain food items, or are strictly an intrastate carrier (operating only within one state), you might not need MC authority.

Private carriers hauling their own goods or nonprofit organizations transporting people might also be exempt.

If you operate a trucking business, then you need to make sure you have the right type of MC authority to operate legally. If you’re unsure, it’s best to check the specific regulations for your type of cargo and operations.

register a business

Steps for Getting MC Authority

Getting MC authority is a relatively straightforward process no matter what state you’re based in.

Step 1: Create a Business Entity

You’ll need to establish your business as a legal entity, such as an LLC or a corporation,to get granted MC authority.

A formal business structure is required to obtain your MC authority and ensure you comply with state and federal regulations.

Consult with a legal or business advisor to help you choose the right business structure for your trucking business.

Step 2: Apply for Your USDOT and MC Number

Once your business entity is set up, you can apply for a USDOT number through the FMCSA. This is the number used to track your company’s safety record and compliance with regulations.

Along with the USDOT number, you’ll need to apply for your MC number. Both numbers are critical for legally operating your trucking business.

Step 3: File BOC-3 Paperwork with a Legal Process Agent

After securing your USDOT and MC numbers, you’ll need to file a BOC-3 form. This form designates a legal process agent in each state where you operate.

The agent is responsible for receiving legal documents on your behalf, such as court notices or legal summons. Having a legal process agent is mandatory for all motor carriers and ensures that you’re properly represented in legal matters.

While it’s a legal requirement, it will also make your life running an interstate trucking business easier if any issues arise.

Step 4: File Your Unified Carrier Registration (UCR) Permit

The Unified Carrier Registration (UCR) system is a federal requirement for any carriers operating across state lines.

After you’ve filed your BOC-3, you’ll need to register under the UCR system. You need this registration to prove that you’re compliant with state regulations and that you’ve paid the required fees for operating in multiple states.

Failure to register can result in penalties and fines, so it’s important to complete this step as soon as you can.

tax form

Step 5: Pay the Heavy Vehicle Use Tax (HVUT)

If your vehicle has a gross weight of 55,000 pounds or more, you’re required to pay the Heavy Vehicle Use Tax (HVUT) to the IRS. This annual tax helps fund highway maintenance and construction.

Paying the HVUT is a legal obligation, and failure to do so can result in significant fines. File your payment on time each year to avoid penalties and to keep your operations running smoothly.

Step 6: Register for the International Registration Plan (IRP)

The International Registration Plan (IRP) allows you to register your vehicle for operation in multiple states and Canadian provinces with a single registration.

This plan is essential for interstate travel, as it ensures your vehicle is legally registered in all the regions where you plan to operate.

The IRP also helps distribute registration fees based on the distance traveled in each jurisdiction, simplifying the process for carriers operating across borders.

Step 7: Set Up an International Fuel Tax Agreement (IFTA) Account

To streamline fuel tax reporting, set up an account under the International Fuel Tax Agreement (IFTA). This agreement simplifies how you report and pay fuel taxes for vehicles operating in multiple states.

With an IFTA account, you’ll file a single quarterly tax report instead of dealing with multiple fuel tax forms. This saves you plenty of time and helps ensure you remain compliant with fuel tax regulations across all the different jurisdictions you operate.

Step 8: Enroll in a Drug and Alcohol Testing Program

If you have drivers operating under your authority, it’s mandatory to enroll in a DOT-compliant drug and alcohol testing program.

This program ensures that all drivers are regularly tested, helping to maintain safety on the road.

The DOT requires pre-employment, random, post-accident, and return-to-duty testing for all drivers. Enrolling in a reputable program is important to staying compliant with federal regulations and promoting a safe driving environment.

Benefits Of Having Trucking Authority

Having your own trucking authority offers some clear benefits, giving you full control over your business operations.

With trucking authority, you can choose your own loads, set your own rates, and negotiate directly with shippers. All of this can lead to higher profits.

You’re not dependent on a third party to find work for you, which means more flexibility and independence in how you run your business.

Holding your own authority can also open doors to more opportunities for growth, allowing you to expand your fleet, take on larger contracts, and establish long-term relationships with clients. This is important for a more stable and prosperous business in the long run.

Conclusion

When operating a trucking business across state lines, there are several essential considerations to keep in mind. One of the most critical is obtaining MC authority, as operating without it could lead to serious consequences.

If you’re busy planning your trucking business, then the right documentation may be essential, but the first and most important step is acquiring the right vehicle. Get in touch with us at Mission Financial Services to discover the easiest way to access commercial truck funding.

Archives

Sign Me Up!

Stay up to date with the latest news in the commercial trucking industry.

Contact Us
close slider