Office: (404) 975-4800

Maintenance & Repair

8 Fleet Maintenance Best Practices for Owner-Operators

8 Fleet Maintenance Best Practices for Owner-Operators

A smiling technician in a plaid shirt and overalls leans against the cab of a blue semi truck in a repair shop.

Fleet maintenance is the routine inspections, repairs, and scheduled service that keep fleet vehicles safe and on the road.

For any commercial fleet running one to ten trucks, it’s also one of your biggest controllable costs. Skip it, and a small, cheap fix can turn into a major repair bill. Stay on top of it, and you protect your equipment, your CSA score, and your bottom line.

Effective fleet management starts with a routine you can actually stick to. This guide covers the maintenance schedules, checklists, and tracking habits that support fleet operations of any size.

TL;DR

  • Preventive maintenance, done on a schedule, costs less over time than reactive repairs and emergency repairs.
  • Fleets with fewer than five trucks often carry the highest repair costs per mile. A plan matters even more for small operations.
  • Set a fleet maintenance schedule by mileage, engine hours, or time, whichever comes first for each truck.
  • Daily driver inspections and clean recordkeeping catch problems before they become breakdowns.
  • A maintenance reserve or financing option can protect your cash flow when something big goes wrong.
  • A few fleet management best practices, followed consistently, reduce operating costs and vehicle downtime.

What Is Fleet Maintenance?

Fleet maintenance is every inspection, repair, and scheduled service needed to keep a commercial vehicle safe and legal. For owner-operators and small fleets, it covers everything from daily pre-trip checks to major engine work. It also directly shapes vehicle reliability and vehicle uptime.

The Federal Motor Carrier Safety Administration requires every carrier to inspect, repair, and maintain the vehicles under its control. This falls under 49 CFR Part 396. It’s also one of seven categories that make up your CSA score and reflect your fleet safety record.

Preventive Maintenance vs. Reactive Repairs

Preventive maintenance follows a set schedule of routine maintenance tasks. Oil changes, filter swaps, brake inspections, and tire rotations happen at planned intervals, whether or not anything looks wrong yet.

Reactive maintenance happens after something has already failed. It costs more, keeps trucks out of service longer, and puts drivers at risk. Unexpected failures like these are exactly what a maintenance plan is built to prevent.

Planned, proactive maintenance almost always beats paying for surprises and helps reduce downtime.

A white semi truck pulling a curtain-side trailer drives down a rural highway under a clear blue sky.

Benefits of Fleet Maintenance

A consistent maintenance program pays off in several ways at once. The biggest benefits include:

  • Fewer breakdowns. Catching worn parts early keeps trucks off the shoulder and on schedule.
  • Lower repair costs. Small, planned fixes cost far less than an unplanned shop visit after a failure.
  • Better fuel efficiency. Properly inflated tires and clean filters help trucks burn less fuel per mile.
  • Stronger driver safety. Reliable brakes, tires, and lights reduce the risk of accidents on the road.
  • Cleaner compliance record. Fewer maintenance violations protect your CSA score and insurance rates.
  • Longer vehicle lifespan. Routine care extends the life of your trucks and protects resale value.

8 Fleet Maintenance Best Practices to Improve Efficiency

Good fleet maintenance follows a clear schedule and a checklist your team actually uses. These management best practices help reduce costs and keep your trucks in optimal condition, so you’re hit with fewer nasty surprises.

1. Build a Maintenance Schedule by Mileage, Hours, or Time

Stick to regular service intervals based on mileage, engine hours, or calendar time, whichever comes first. Start with the manufacturer’s guidelines, then adjust for actual vehicle usage.

A truck running stop-and-go city routes wears brakes faster than one on steady highway miles. A truck hauling heavy loads through mountain grades needs earlier transmission checks. A truck sitting idle for weeks still needs time-based service, even at low mileage.

Many small fleets combine two triggers to stay covered. One example: service every 25,000 miles or twelve months, whichever comes first. That way, a truck with light mileage still gets attention on schedule.

Regular servicing can cut total maintenance costs by 12% to 18%.

2. Create a Checklist and Assign Ownership

A maintenance checklist only helps if your team follows it every time. Organize it by system: engine, brakes, tires, electrical, steering, and body, matching each truck’s maintenance requirements. That way, nothing gets missed during a service visit.

For a full breakdown by component, our truck maintenance checklist for owner-operators walks through each system step by step.

Two technicians review a fleet maintenance checklist together in front of a blue semi truck in a service bay.

3. Cover the Core Preventive Maintenance Tasks

A solid preventive maintenance list covers fluids, filters, tires, brakes, wheel ends, batteries, and the electrical system. Each of these wears down gradually and affects vehicle performance if ignored.

Tires, Brakes, and Wheel Ends

Check tire pressure and tread depth on a schedule, not just when something looks off. Underinflated tires wear faster and hurt fuel efficiency. Regular tire service and rotation also helps extend vehicle lifespan.

Brake pads and drums need regular inspection. Brake and tire problems are among the most common issues flagged at roadside inspections.

Also check wheel ends. A failing carrier bearing often gives off warning signs like grinding noise or wheel wobble before it fails. A bearing failure on the road means real fleet downtime.

Fluids, Filters, and Engine Care

Engine oil, lubricants, coolant, and diesel exhaust fluid all need regular checks. Don’t just top them off when a warning light comes on. Contaminated or low fluids speed up engine wear, hurt engine performance, and trigger costly downtime.

Air and fuel filters protect the engine from dust, debris, and moisture that build up over thousands of highway miles. Clean filters help keep fuel usage predictable and improve fuel efficiency.

Oil changes are one of the most routine services a truck needs. Staying on schedule protects the engine more than any single fix after the fact.

Warning Lights and Diagnostic Checks

Modern trucks come with dozens of dashboard warning lights, and not all of them mean pull over right now. Knowing what each dashboard warning light means helps you gauge vehicle health and decide whether to keep driving.

Telematics and onboard diagnostics can flag fault codes before a light even comes on. Many systems also monitor driver behavior and feed fleet data back to your maintenance team.

Trucks with advanced driver assistance systems need extra care during windshield or sensor repairs to stay properly calibrated.

A close-up of a dark semi truck dashboard showing illuminated warning lights, including a hazard triangle icon and digital display.

4. Run Daily Driver Inspections

Driver inspections catch small problems between scheduled service visits. Federal regulations require drivers of most commercial vehicles to inspect the truck daily. They must also complete a written report after each day’s work.

Drivers must report any defect that could affect safety. Carriers must fix flagged issues before the truck goes back on the road.

A consistent routine turns your drivers into an early warning system. It also gives you a clearer read on driver performance over time.

Our pre-trip inspection checklist for truck drivers gives your team a consistent format to follow.

5. Train Drivers to Reduce Wear and Fuel Use

Driver behavior directly affects your maintenance costs. Hard braking, fast acceleration, and excess idling wear down brakes, tires, and engines faster than normal driving.

A short training refresh on smooth braking, steady acceleration, and proper shifting can cut wear on major components over time.

It also improves fuel efficiency, since aggressive driving and unnecessary idling both burn extra fuel per mile. Pairing training with telematics data gives you a clear picture of which habits to coach.

6. Protect Your CSA Score and Insurance Rates

Poor maintenance shows up directly in your CSA score through the Vehicle Maintenance category. That score reflects your fleet safety record. It can also drive up your insurance premiums.

Clean inspection records protect both and help you maintain compliance year after year.

FMCSA tracks Vehicle Maintenance violations for 24 months. A poor score can trigger a warning letter or a compliance investigation. Insurers also review your maintenance history when they set your premium.

Keeping repair receipts, inspection reports, and DVIRs organized protects you in an audit.

7. Track Maintenance Costs, KPIs, and Records

Managing fleet maintenance well comes down to one habit: tracking with a simple, consistent system. Centralized tracking can help to reduce compliance and safety risks.

A log per vehicle should show date, mileage, service performed, cost, and technician.

A spreadsheet works fine for a handful of trucks, as long as someone updates it after every service. Many fleets outgrow spreadsheets once they add a second or third truck. Dedicated fleet maintenance software makes sense to use once manual tracking starts taking up real time. It also keeps fleet management operations simple and supports better operational efficiency as you grow.

Cost per mile is one of the simplest fleet maintenance KPIs you can track. Maintenance is one line item inside it, alongside fuel, insurance, and financing.

Tracking it separately shows you which trucks cost more than they’re worth and highlights vehicle utilization patterns worth addressing so that you know when to replace your trucks.

A hand holds a tablet displaying bar charts and performance data, used for tracking fleet maintenance costs and KPIs.

8. Budget and Finance for Maintenance Before You Need To

Build a maintenance reserve for routine costs. Consider financing for major repairs or unplanned breakdowns, so that a single bill doesn’t wipe out your working capital.

Repair and maintenance costs have climbed sharply across the industry in recent years. Higher parts prices, aging equipment, and rising labor costs are the main drivers.

In our experience working with owner-operators, planning for maintenance costs up front makes a real difference. Operators who do this handle a blown turbo or a transmission rebuild far better than those who don’t.

A repair loan or a short-term operating capital loan can cover a major fix. That keeps your trucks earning instead of sitting in a shop.

If a truck is getting expensive to maintain, weigh financing a replacement against another round of repairs. That could mean a repair loan now, or a vehicle acquisition down the line.

Conclusion

These eight fleet maintenance best practices work whether you run one truck or ten. A clear schedule, a checklist your team actually uses, and daily driver inspections go a long way on their own. Layer in cost tracking and a plan for paying for the big repairs, and you’ll reduce costs while keeping your trucks on the road and your business moving forward.

Maintenance is manageable when you plan for it. It’s the surprises that hurt, and that’s usually where cash flow gets tight fastest.

Need Help Covering a Repair or Upgrading Your Fleet?

The right financing keeps a maintenance issue from turning into a bigger cash flow problem. Mission Financial Services offers repair loans, operating capital, and direct lending for truck purchases. We built our process for drivers who don’t have time to wait on a slow approval. See what you could qualify for today.

Frequently Asked Questions

How often should a commercial truck get an oil change?

Follow the engine manufacturer’s recommended interval, usually tied to mileage or engine hours. Shorten that interval for stop-and-go routes or extreme temperatures.

What is the difference between preventive and reactive maintenance?

Preventive maintenance follows a set schedule regardless of whether something looks wrong yet. Reactive maintenance happens after a part has already failed, and it usually costs more.

What is the difference between fleet maintenance and fleet maintenance management?

Fleet maintenance is the hands-on work: inspections, repairs, and part replacements on each truck. Fleet maintenance management is the bigger picture. It covers scheduling, budgeting, and recordkeeping across your whole operation.

Do owner-operators need a written maintenance program?

FMCSA doesn’t require a specific template. It does require every carrier to inspect, repair, and maintain their vehicles, and to keep records that prove it.

How can I pay for a major truck repair?

Options include a maintenance reserve fund, a dedicated repair loan, or a short-term operating capital loan. Which one fits depends on how urgent the repair is and how it affects your cash flow.


The Ultimate Semi Truck Inspection Checklist

The Ultimate Semi Truck Inspection Checklist

Preforming a pre-trip inspection on a truck,Concept preventive m

Whether you’re an experienced driver or new to the industry, conducting a complete inspection before every trip protects you, your vehicle, your cargo, and your business.

A proper inspection helps you identify mechanical issues early and avoid roadside violations that can damage your Compliance, Safety, Accountability (CSA) score or lead to out-of-service orders.

This ultimate semi-truck inspection checklist is designed to help truckers stay ahead of issues, maintain industry compliance, and ensure every component of your truck and trailer is working properly before hitting the road.

By paying close attention to the details outlined below, you’ll be better prepared for daily operations and long-haul demands.

Why Semi Truck Inspections Matter

Semi truck inspections prevent breakdowns, improve safety, reduce costly repairs, and keep you compliant with Department of Transportation (DOT) and Federal Motor Carrier Safety Administration (FMCSA) regulations.

Semi trucks can weigh up to 80,000 pounds, and when a component fails at that scale, the consequences can be serious: accidents, cargo damage, missed delivery windows, unexpected downtime, and potential liability problems for the driver and carrier.

Routine inspections help you:

  • Identify wear and damage before they become mechanical failures
  • Verify fluid levels, gauges, hoses, and brake components are in safe operating condition
  • Stay compliant with FMCSA and avoid fines, penalties, and out-of-service orders
  • Maintain complete and accurate inspection records for audits and roadside checks
  • Protect your income by reducing preventable breakdowns and roadside delays
  • Extend the life of critical components, including brakes, tires, suspension, and the engine compartment

By paying close attention to both the truck and trailer before every trip, you ensure safer driving conditions, strong reliability, and long-term performance for your vehicle and business.

Truck driver checking vehicle tires and inspecting truck before ride. Transportation services.

Complete Semi Truck Inspection Checklist

Before you pull out of the yard, run through this commercial truck checklist to confirm nothing is missing or damaged.

1. Exterior Walkaround

Perform a complete exterior walkaround to verify the truck’s overall condition. An exterior walkaround helps you spot early signs of mechanical issues before they turn into costly repairs or safety problems.

Check each item individually:

  • Inspect mirrors, windows, and the windshield for cracks, chips, loose mounts, or missing seals.
  • Ensure doors, hinges, and latches open and close properly.
  • Confirm steps, grab handles, and fenders are secure and free of damage.
  • Check hood latches, hood alignment, and surrounding panels for proper fit.
  • Examine frame rails, crossmembers, and exterior body panels for corrosion or structural damage.
  • Verify reflective tape, DOT markers, and reflectors are intact and clearly visible.

2. Tires and Wheels

Properly maintained tires and wheels improve handling and overall safety on the road. Inspect each tire and wheel assembly carefully before every trip:

  • Measure tire pressure with a gauge and compare to the manufacturer’s specifications.
  • Check tread depth with a gauge; ensure no exposed cords, cuts, or bulges.
  • Inspect sidewalls for cracking, dry rot, or punctures.
  • Examine rims for cracks, dents, rust trails, or bent edges.
  • Verify lug nuts are tight and look for shiny metal or rust streaks indicating looseness.
  • Check wheel seals for visible leaks or residue.

3. Brake System

The brake system requires close attention due to its safety-critical role:

  • Inspect air lines and hoses for cuts, wear, and audible leaks.
  • Confirm brake chambers are securely mounted, undamaged, and not dented.
  • Verify that slack adjusters have proper free play and move as expected.
  • Check brake pads or shoes for proper thickness and even wear.
  • Inspect push rods, pins, springs, and mounting hardware for missing or loose components.
  • Look for brake fluid leaks around calipers, fittings, or lines (if applicable).

pexels-cottonbro-7541350

4. Lights and Reflectors

Confirm that all lighting and visibility components are operating properly. Missing or malfunctioning lights can lead to citations and increased risk during night or low-visibility driving:

  • Test headlights, high beams, taillights, brake lights, and turn signals.
  • Check clearance lights, marker lights, and license plate lights for brightness and operation.
  • Ensure reflectors on the front, rear, and sides are present, clean, and undamaged.
  • Wipe away dirt, snow, or road grime that reduces visibility.

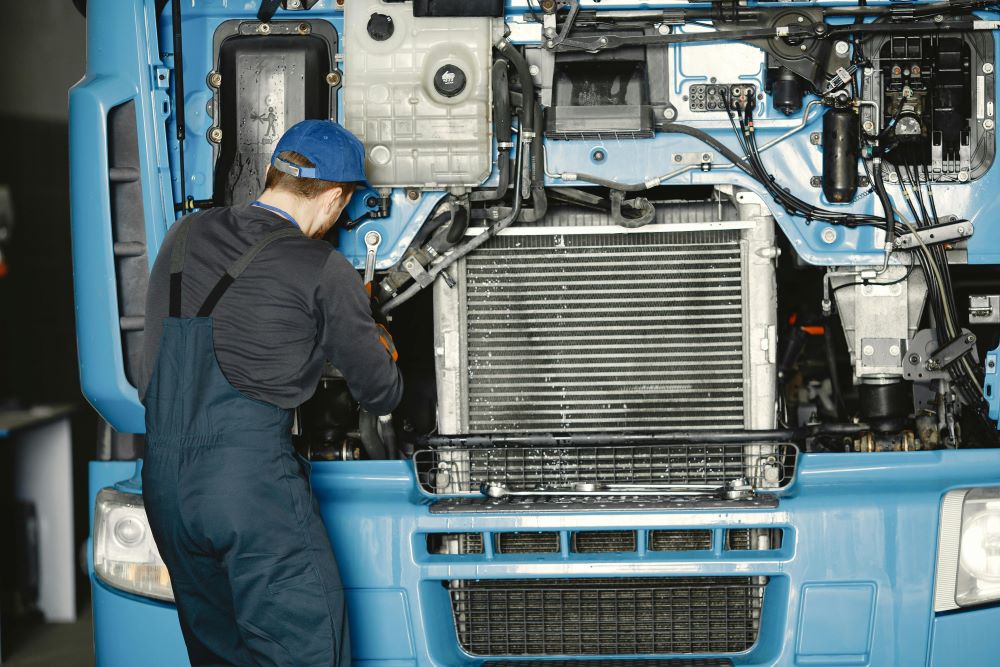
5. Engine Compartment

A clean, leak-free engine compartment reduces breakdowns and improves long-term performance. Inspect the engine compartment with precision:

  • Check oil, coolant, brake fluid, and power steering fluid levels.
  • Inspect belts for proper tension, fraying, cracks, or glazing.
  • Check hoses for soft spots, bulges, cracks, or loose clamps.
  • Look for oil, coolant, or fuel leaks around lines, filters, and gaskets.
  • Examine mounting brackets, bolts, and engine supports for looseness or damage.
  • Inspect the radiator, fan, and shroud for cracks or obstructions.

6. Suspension System

Faulty suspension components impact handling and vehicle stability. Confirm the suspension can safely support your load and maintain stability:

  • Inspect leaf springs for cracks, shifted packs, or missing leaves.
  • Check shock absorbers for leaks, loose mounts, or excessive wear.
  • Verify airbags are holding air, free of punctures, and properly aligned.
  • Examine mounts, hangers, and U-bolts for cracks or missing hardware.

7. Steering Components

Any steering abnormality must be addressed immediately to prevent loss of control. Verify the steering system provides full, controlled movement:

  • Check the steering gearbox for leaks, secure mounting, and proper connection to the frame.
  • Inspect linkages, tie rods, and joints for looseness or worn components.
  • Confirm power steering hoses and pump are leak-free.
  • Turn the steering wheel to evaluate free play and responsiveness.

8. Fifth Wheel and Coupling Devices

Proper coupling prevents trailer separation, one of the most dangerous failures in trucking. Check the coupling system with extreme accuracy:

  • Ensure the locking jaws fully close around the kingpin and cannot move.
  • Confirm the release arm is properly seated and locked.
  • Inspect the fifth-wheel platform, mounting bolts, and skid plate for cracks or damage.
  • Verify grease coverage is sufficient to prevent friction or premature wear.
  • Check the kingpin for excessive wear or damage.

9. Trailer and Cargo Securement

Proper cargo securement prevents freight movement, rollovers, and DOT violations. Inspect the trailer and its securement equipment for safety and compliance:

  • Check trailer doors, hinges, latches, and locks for full functionality.
  • Inspect the trailer floor, walls, and roof for rot, holes, or structural damage.
  • Verify that load locks, straps, chains, binders, and winches meet DOT securement standards.
  • Ensure cargo is balanced, tightened, and unable to shift.
  • Confirm placards, reflectors, and marker lights are present and clean.

10. Exhaust System

A healthy exhaust system prevents fumes from entering the cab and ensures emissions compliance. Make sure the exhaust system is secure and leak-free:

  • Inspect pipes, clamps, and mounting brackets for cracks or missing hardware.
  • Look for soot trails, which indicate leaks or broken connections.
  • Confirm heat shields are intact and not rubbing against components.

11. Fuel System

Fuel system issues can cause fires, breakdowns, or failed inspections. Inspect the fuel system for leaks or contamination risks:

  • Check fuel tanks for dents, corrosion, or loose straps.
  • Ensure fuel caps seal tightly and the vents function properly.
  • Inspect fuel lines for cracks, leaks, or friction points.
  • Verify water separators and fuel filters show no signs of contamination.

12. Air and Electrical Lines

Faulty lines impact service brakes, ABS, and lighting, making this step critical. Confirm all connections between the truck and trailer are safe and functional:

  • Ensure air lines are connected securely with no audible leaks.
  • Inspect glad-hands for proper seals and lubrication.
  • Check electrical cables for frayed insulation or exposed wiring.
  • Verify the 7-way plug seats are fully seated and power the trailer lights correctly.

13. In-Cab Inspection

A thorough cab inspection ensures you remain comfortable, informed, and compliant on the road. Verify that all cab systems and safety components function properly:

  • Check seat belts for secure latching and visible wear.
  • Start the truck and confirm gauges (oil pressure, temperature, air pressure, voltage) reach normal operating ranges.
  • Test the horn, windshield wipers, and washer fluid.
  • Confirm the heater, defroster, and AC work correctly.
  • Adjust mirrors and ensure the cab is free of loose items that could interfere with driving.
  • Verify all warning lights and indicator lamps operate correctly during start-up.

14. Emergency Equipment

Emergency equipment ensures you can safely respond to breakdowns or hazardous conditions. Ensure all emergency tools meet DOT requirements and are ready for use:

  • Check the fire extinguisher for proper charge, secure mounting, and accessibility.
  • Confirm reflective triangles are present and undamaged.
  • Verify fuses or circuit breakers are available for electrical repairs.
  • Inspect any first-aid kits or additional safety items required by your carrier.

Conclusion

A comprehensive checklist helps drivers operate safely, avoid violations, and stay ahead of mechanical issues that could lead to costly repairs.

By examining each component (tires, brakes, lights, engine compartment, trailer, and in-cab systems), you ensure your truck is road-ready and fully compliant with industry standards.

If your truck needs financing for repairs or replacement equipment, Mission Financial Services can help.

We provide direct lending solutions designed specifically for owner-operators and small fleets, including bad credit loans, repair loans, first-time buyer programs, and more.

If you’re preparing your vehicle for the road and need reliable financing support, Mission Financial Services is ready to help you keep your business moving. Start your credit application today.

How to Jump-Start a Semi-Truck

How to Jump-Start a Semi-Truck

Are you a truck driver for a small trucking business or an owner-operator? You’ll face various challenges along the road, and one of them is the dreaded dead truck battery. But learning how to jump-start a semi-truck will give you the confidence you need to deal with this common issue.

This article walks you through everything you need to know, from gathering the right tools to knowing when to call a pro. Our jumpstart for semi-truck step-by-step guides and handy tips will get you back on the road again quickly and safely.

Equipment Required to Jump-Start a Semi Truck

Semi-truck repair insurance does not cover dead batteries. Fortunately, once you know how to jump-start a semi-truck, it’s often a cheap and simple fix. But jump-starting a semi truck requires more than standard automotive tools.

You need heavy-duty jumper cables that can handle large electrical loads and a donor vehicle with a compatible electrical system. You may also want to wear safety glasses and gloves.

Many operators carry a commercial-grade jump starter or portable power pack, which provides a powerful and often safer alternative. Other helpful items include a battery terminal brush and a voltage meter for diagnosing battery issues.

Choosing Heavy-Duty Jumper Cables

The most important thing about jump-starting your truck is that you must use heavy-duty jumper cables.

Light-duty cables designed for cars and vans won’t work on a semi truck. Most semi trucks have 3 or 4 12-volt batteries. Each is rated at around 1000 cranking amps. Therefore, choose cables rated for 1000 amps or more. Use cables at least 20 feet long so you can easily reach between vehicles.

Use 100% copper or high-quality copper-clad aluminum cables. Copper conducts electricity better and lasts longer. Make sure the insulation resists oil, heat, and abrasion. Use clamps that grip battery terminals securely.

Tools Needed for Jump Starting a Semi Truck

In addition to heavy-duty jumper cables, keep the following tools handy:

  • Battery terminal cleaner or wire brush. This removes corrosion for better connections.
  • A multimeter or voltmeter. This measures the voltage before and after the jump-start.
  • Work gloves and safety goggles. They protect hands and eyes.
  • Portable jump starter (optional): It offers a self-contained solution without needing another vehicle.
  • A flashlight to illuminate dark areas under the hood. This is even more useful if attempting a jumpstart in the dark of night.

These tools ensure you can jump-start your semi truck safely and efficiently.

Safety Measures and Precautions

Working around high-voltage systems can be dangerous if you don’t follow proper safety steps. Before you get started, take these precautions:

  • Verify that the donor vehicle has an equal or higher voltage system.
  • Turn off both vehicles before connecting the jumpstart cables. Set both trucks to neutral or park. Engage the parking brakes.
  • Remove metal jewelry and keep tools away from terminals.
  • Avoid leaning over batteries, and wear protective gear like gloves and goggles.

Step-by-Step Guide to Jump-Start a Semi Truck

The life of a trucker can be both exhilarating and challenging. Different truck types, routes, and roles mean that trucking can be a different experience for everyone. But getting sidelined by a dead battery frustrates every trucker.

If your truck won’t start or struggles to start, dead or weak batteries may be the cause.  It’s best to use another truck as the donor vehicle or a dedicated jump starter designed for heavy-duty vehicles. A jumpstart is the quickest and cheapest solution.

Follow these steps carefully, and you’ll know how to jump-start your semi truck safely.

Step 1

The jumper cables have to reach both vehicles’ batteries, so position the truck that will be jumpstarting you as close to your semi as possible. However, the vehicles must not touch each other. Turn off both trucks and set them in neutral or park.

Step 2

Semi-trucks often have dual batteries or multiple batteries connected in series to meet the high power and performance demands of their engines. Open the trucks’ hoods and locate all batteries. Ensure that you understand your battery configuration before attempting a jumpstart.

Step 3

Inspect the batteries closely and check for battery acid leaks and cracks. If you find any damage, leaks, or cracks, don’t continue. The battery needs to be safely disposed of and replaced. Check the battery terminals for signs of corrosion. If you detect corrosion, clean the terminals with a wire brush to remove it.

Step 5

Once you have determined that the battery has no leaks or cracks and is free from corrosion, you may connect the jumper cables:

  • Clamp a red (positive) cable to the positive terminal of the dead battery, and the other red one to the positive terminal of the donor battery.
  • Clamp the black (negative) cable to the negative terminal of the donor battery. Attach the other black one to an unpainted metal surface on the engine block or chassis of your semi with the dead battery.

If you are unsure whether or not the battery is flat or if another issue may be at play, check the voltage before and after jumpstarting. However, this is unnecessary if you are certain that a flat battery is the only problem.

Step 6

Start the donor vehicle. Let it run for a few minutes to supply enough current. After a few minutes, try to start your semi-truck. If it doesn’t start, don’t stress; it can sometimes take a while. Just wait a few more minutes and try again.

Step 7

Remove the cables in reverse order:

  1. Disconnect the black clamp from the chassis.
  2. Remove the black clamp from the donor battery.
  3. Remove the red clamp from the donor battery.
  4. Detach the red clamp from the semi truck battery.

Step 8

Let the semi-truck idle for a while. Keep it running for 15 to 30 minutes to recharge the battery.nDrive it a while or test the battery’s voltage to confirm it’s holding a charge.

How Many Amps to Jump Start a Semi Truck

Semi trucks use powerful batteries. To jump-start a semi truck, you usually need 1000 to 2000 amps. Cold weather may require more. Use a portable jump starter that offers at least 1500 peak amps.

Donor vehicles, like other semi trucks or heavy-duty diesel pickups, can usually provide enough current. Smaller vehicles don’t have the power. Always match your cables and jump starters to your truck’s electrical needs.

Caring for Your Semi Truck Battery

From semi-truck wheel alignment to oil changes, regular maintenance is key to keeping your trucks on the road. But don’t forget about battery maintenance and care. Take care of your semi-truck batteries to reduce the need for future jump-starts.

  • Inspect connections: Tighten loose cables and clean corrosion.
  • Check fluid levels: Add distilled water to non-sealed batteries if needed.
  • Test voltage regularly: Use a multimeter to verify the charge.
  • Avoid deep discharges: Turn off accessories when the engine isn’t running.

Signs of Battery Failure

Watch for these warning signs:

  • Dim headlights or dashboard lights
  • Slow engine cranking
  • Clicking noise when turning the key
  • Accessory malfunctions
  • Swollen or leaking battery case

Replace the battery if you spot these symptoms.

Understanding the Electrical System of a Semi Truck

To know how to jump-start your semi truck, understand its electrical setup. Most semis use 12-volt or 24-volt systems powered by two 12-volt batteries.

These systems supply power to the ignition, lights, refrigeration units, and electronics. Issues with alternators, voltage regulators, or wiring can affect the entire truck. Know how the parts work together to diagnose issues and avoid repeated jump-starts.

When to Call a Professional

Call a professional if you experience the following:

  • Remaining uncertainty about how to jump-start your semi-truck.
  • Battery damage or battery acid leaks.
  • The truck won’t start after multiple attempts.
  • Strange sounds or the smell of burning.
  • You lack a donor vehicle or a high-powered jump starter.

Professionals have the training and equipment to resolve the issue safely.

Conclusion

Knowing how to jump-start your truck is an essential skill for owner-operators and fleet managers. With our guide to jumpstarting a semi and the right tools, you can handle dead batteries efficiently. And our tips for battery care will extend your semi-battery’s life.

But when your problems are bigger than a dead battery, get the funds you need here at Mission Financial Services.

Do you need to do urgent repairs? We offer semi-truck repair loans. Would it be more economical to replace your ailing truck? We’ll start the ball rolling with a loan for a new (or used but new to you) semi-truck. Contact us today for further information and advice.

Semi-Truck Alignment Guide

Semi-Truck Alignment Guide

Proper semi-truck alignment is one of the most important aspects of vehicle maintenance for heavy-duty trucks. When your truck’s wheels aren’t properly aligned, it can lead to a host of costly problems. This could include uneven tire wear and steering wheel vibration, to decreased fuel efficiency and poor vehicle control.

In this guide, we break down what alignment really means for a diesel truck, how to spot alignment issues, and why keeping your truck properly aligned can extend tire life, improve fuel economy, and ensure a smooth ride for thousands of miles.

What Is Semi-Truck Alignment?

Truck alignment, also called truck wheel alignment, is the process of adjusting a vehicle’s suspension components and axle angles so that the wheels meet the road at precise angles. These angles, including the camber, caster, and toe, determine how your tires make contact with the pavement.

In heavy-duty applications, alignment typically focuses on the front axle, but can extend to the rear axle or even include all axles in what’s known as a final alignment. When any of these angles are off, your semi-truck might experience steering wheel vibration, vehicle pulling, or abnormal tire wear.

It’s important to note that alignment isn’t just about the wheels. It’s also about how the steering components, suspension system, and axle offset work together to keep your truck driving straight and steady under heavy loads.

Why Semi-Truck Alignment Is Important

A properly aligned semi-truck offers multiple benefits that go beyond tire preservation.

First and foremost, truck drivers experience better steering response and safer handling. When alignment is off, the truck may pull to one side, the steering wheel may feel loose or shaky, or the truck may show signs of a crooked steering wheel or off-center steering wheel.

But the impact isn’t just felt in the cab. Misalignment creates increased rolling resistance, which in turn reduces fuel efficiency. For long-haul drivers and fleet managers, poor fuel economy can significantly raise operational costs.

Signs a Semi-Truck Needs Alignment

How do you know it’s time to get your alignment checked? Watch for these common indicators of alignment problems:

  • The truck pulls to one side or has difficulty driving straight.
  • Steering wheel vibration, especially at highway speeds.
  • A crooked steering wheel or off center steering wheel.
  • Uneven or abnormal tire wear across the treads.
  • Frequent corrections are needed to keep the vehicle in a straight line.
  • Decreased fuel efficiency.

All of these are red flags that your semi-truck’s alignment is off. Ignoring them may lead to premature wear on tires and key suspension and steering components.

How Often Should a Semi-Truck Alignment Be Done?

There’s no one-size-fits-all answer, but routine maintenance suggests that heavy-duty vehicles should have their alignment checked every 50,000 to 60,000 miles. However, various factors can require more frequent checks.

If your truck has recently hit a curb, driven over a pothole, or been involved in an accident, it’s wise to check alignment immediately. Likewise, trucks carrying frequent heavy loads may require more attention due to increased strain on the axles and suspension system.

Based on our expertise, keeping alignment as part of your vehicle maintenance schedule helps prevent alignment issues from spiraling into bigger, costlier problems.

The Truck Wheel Alignment Process

During a wheel alignment, a technician uses specialized equipment, usually laser or computerized systems, to measure and correct wheel angles. The process begins by assessing current positions relative to OEM specifications and ends with adjustments to steering, suspension, and axle settings.

Most full-service alignment shops will include a front axle adjustment and, if needed, corrections to the rear axle. Some shops even specialize in aligning heavy-duty and diesel truck models, which often require more precision due to their weight and usage.

Causes of Misalignment in Semi-Trucks

Misaligned wheels can result from everyday events, especially when driving a heavy-duty truck. Common causes include:

  • Hitting potholes, curbs, or road debris.
  • Overloaded or unbalanced trailers.
  • Worn suspension components.
  • Faulty or damaged steering components.
  • Uneven axle offset.

Even a small impact can throw off alignment. And, when you consider the weight and length of a fully loaded semi-truck, the effect on tire wear and steering can be dramatic.

The Benefits of Regular Wheel Alignments

Routine wheel alignment services offer long-term advantages for semi-truck owners and fleet operators:

  • Improved fuel efficiency through reduced rolling resistance.
  • Longer tire life with even wear across all tires.
  • Enhanced steering system performance and vehicle handling.
  • Smoother rides for truck drivers and less driver fatigue.
  • Lower operational costs from fewer part replacements.

Even small adjustments can lead to noticeable improvements in performance and savings. For example, maintaining proper tire pressure and alignment can boost fuel efficiency by as much as 3%. This is a meaningful difference when operating heavy-duty vehicles over long distances.

Perhaps most importantly, a proper alignment ensures that the truck remains safe and roadworthy. For owner-operators and fleets alike, it’s an investment that pays for itself through extended equipment life and better fuel returns.

How Much Does Semi-Truck Alignment Cost?

The cost of semi-truck alignment can vary based on the number of axles serviced (front only vs. full alignment), labor costs in your area, condition of steering and suspension systems, and whether additional services (like tire balancing) are included.

On average, alignment for a diesel truck or heavy-duty vehicle ranges from $200 to $400. If your truck needs adjustments to the rear axle or extensive suspension work, the cost may be higher.

But compared to the price of replacing multiple sets of tires or burning excess diesel due to poor alignment, regular alignments are a smart financial move.

Choosing the Right Alignment Shop

The right shop should use specialized equipment designed specifically for truck wheel alignment. They should also have proven experience diagnosing and repairing suspension systems, with a strong understanding of axle offset, rear axle adjustments, and precise steering geometry.

Look for a provider with a solid reputation, ideally backed by positive reviews from other truck drivers or fleet operators who trust their work.

Conclusion

Keeping your semi-truck alignment in check is essential for maintaining tire life, reducing operational costs, and ensuring a smooth ride.

From minimizing uneven tire wear and steering wheel vibration to improving fuel efficiency and extending the life of your steering and suspension components, regular wheel alignment is a crucial part of vehicle maintenance.

If you’re a truck driver or small fleet owner looking to maintain your heavy-duty vehicle properly, don’t overlook the importance of routine alignment checks. For help financing repairs or locating trusted service partners, turn to Mission Financial Services.

semi truck oil change

How Much Does a Semi Truck Oil Change Cost?

semi truck oil change2

Regular oil changes are crucial for keeping your semi-truck’s engine clean and extending its lifespan. However, costs can add up quickly, impacting your profits if not managed wisely.

So, how do you know when it’s time for an oil change, and what does a typical semi-truck oil change cost? This guide covers everything you need to know, including cost factors and money-saving tips to keep your truck running smoothly without breaking the bank.

Understanding the Importance of Oil Changes

Besides getting rid of the contaminants, dirt, and debris in your old oil, keeping your engine clean, and preventing engine seizure, frequent oil changes are crucial for the following reasons:

  • Protecting your engine from premature wear and tear. Your semi-truck engine consists of several precision-engineered parts designed to work together. Oil lubricates these parts, dissipates heat, and prevents friction, which causes wear and tear that can reduce its performance.


  • Increased engine efficiency. When your engine is lubricated properly, it requires less energy to rotate as you drive, maximizing its performance.


  • Better gas mileage. An efficient engine performs at its optimum without overusing fuel. You can cover more miles with less fuel, reducing your fuel budget and saving more money.


  • Environmental benefit. When your semi-truck engine works efficiently, it burns less fuel and releases fewer emissions into the environment.

semi truck oil change

Factors Influencing Oil Change Costs

The average cost of a semi-truck oil change depends on several factors. Some of these include:

  • Engine design complexities. The engines of newer trucks are more complex and may require specialized oil than older ones.


  • Type of oil used. Some truck models work best on synthetic oil, while others require conventional or a blend of synthetic oil. Different types of oil cost different amounts. For example, if your semi-truck requires synthetic oil, your oil changes will cost more as it’s the most expensive oil.


  • Labor and service provider expenses. Some engines are more complex to work on than others, especially the newer models. Service providers will, therefore, charge differently for their oil change labor and other add-on services.


  • Geographic location. Oil change service costs differ in various locations.


Typical Oil Change Intervals for Semi Trucks

Oil change frequency varies by semi-truck, but general guidelines are: 5,000 miles for conventional oil, 8,000 miles for semi-synthetic, and 10,000 miles for full synthetic. However, always refer to your truck’s user manual for the most accurate schedule.

Regular oil level checks during trips are essential to maintaining engine health. Here is a quick guide on checking your semi-truck oil level using the well-known dipstick method.

Risks of Neglecting Oil Changes

You might be wondering what would happen if you neglect regular oil changes. Well, some of the risks you’re exposing yourself to when you put off an oil change include:

  • Engine damage. When you fail to replace your oil with fresh oil, dirt, and debris from the old oil accumulate. Your engine then develops carbon deposits that clog your system, leading to engine damage, which is usually more expensive to repair.


  • Reduced fuel economy. Without proper lubrication, your semi-truck engine burns more fuel faster than usual. It decreases fuel economy as you’ll require more fuel to cover fewer miles. This will increase your operating costs and reduce your profits.

semi truck oil change3


  • Overheating. Extremely low engine oil levels cause your engine to build friction and run at higher-than-normal temperatures. As a result, your engine components begin to wear and tear rapidly, developing costly engine issues.


  • Complete engine failure. Taking too long to change oil turns it into sludge. If this happens, your engine parts will not get lubricated. Instead, the sludge might gum them up, causing your semi-truck engine to seize and fail.

Semi Truck Oil Change Cost

A basic conventional oil change costs around $35, rising to $75 with add-ons like an oil filter replacement and tire rotation. Semi synthetic oil changes range from $40 to $100, while full synthetic costs $65 to $125.

However, prices vary depending on factors like truck model and special filters, with some changes exceeding $260.

Create a Preventative Maintenance Plan

One of the best ways to save money and ensure your engine operates efficiently is to create a preventative maintenance plan for your oil changes at the required intervals.

For cost-effective and reliable service, choose a trusted truck repair shop, preferably an independent one, as they’re often more affordable and provide personalized care.

Once you’ve found a mechanic, set a budget for regular oil changes and maintain a schedule. Keeping records of routine maintenance ensures timely oil changes and helps extend your truck’s lifespan.

Conclusion

Regular oil changes are essential to keeping your semi-truck running efficiently. While they require frequent spending, they help you save on fuel and prevent costly repairs in the long run.

For even greater savings, consider changing the oil yourself. Though you’ll need to invest in wrenches, an oil pan, a jack, and gloves, this one-time cost pays off with every DIY oil change.

If you ever need help financing other semi-truck repairs, call us. We offer affordable semi-truck repair loans tailored to your situation to keep you on the road.

pre trip inspection

Pre-trip Inspection Checklist For Truck Drivers 

pre trip inspection

Conducting pre-trip inspections is essential for your safety as a truck driver and the safety of all road users. That’s why the Federal Motor Carrier Safety Administration (FMCSA) provides pre-trip inspection checklist standards all commercial driver’s license (CDL) holders must adhere to before hitting the road.

Usually, meeting FMCSA’s pre-trip inspection standards involves a few steps and might take approximately 10 -15 minutes minimum. If you’re wondering what a pre-trip inspection checklist is and why it’s important, read on to learn more.

What is a Pre-Trip Inspection Checklist?

The Department of Transportation (DOT) pre-trip checklist is an essential tool for Class A and Class B commercial driver’s license (CDL) holders to review before operating their vehicles. It is a guide to help you inspect various parts of your commercial vehicle and ensure it’s in proper working order before heading out.

The specific items on a pre-trip checklist can vary depending on the type of commercial vehicle and its intended use. For commercial trucks, the checklist covers nearly all components, accessories, and systems, including the truck, trailer, and cargo.

For Class A CDL holders, the checklist focuses on towing systems, such as the trailer parking brake and coupling areas, and typically extends to the trailer, flatbed, or other towed items. In contrast, the Class B CDL checklist emphasizes systems and parts for non-towing commercial vehicles.

Both Class A and Class B checklists share common items, including checks for brake lights, oil levels, front and rear suspension, and minimum brake pad thickness, among others.

inspection checklist

Importance of a Pre-Trip Checklist?

A thorough inspection checklist streamlines the pre-trip process, ensuring careful and consistent vehicle assessments without missing details. It also simplifies completing required inspection reports, which is crucial for several reasons:

  • Safety–well-performed pre-trip inspections help you identify potential mechanical issues early. Detecting and resolving mechanical problems in time ensures your truck is safe to drive. It also minimizes delays from unexpected vehicle breakdowns.


  • Compliance–FMCSA provides specific vehicle inspection regulations commercial drivers must follow to ensure their vehicles are in peak condition for maximum road safety. Failing to comply with these regulations or performing incomplete pre-trip inspections might lead to penalties and affect your Compliance, Safety, and Accountability (CSA) score.

Low CSA scores can increase insurance premiums, leading to high operating costs.

  • Maintenance– routine pre-trip inspections ensure proper vehicle maintenance. You’ll prolong the vehicle’s lifespan and avoid costly repairs later.


  • Company reputation–proper adherence to all federal inspection regulations demonstrates your commitment to safety and professionalism. It leaves a positive impression on customers and other industry stakeholders, boosting your company’s reputation.

What to Include on a Pre-Trip Inspection Checklist

Commercial trucking companies may prepare their own pre-trip inspection checklist, adding their expectations and twists to the pre-trip inspection procedure. However, all processes must follow the federal pre-trip inspection checklist criteria.

A standard legal pre-trip inspection procedure should include the following steps and elements.

pre trip inspection 2

Step 1: Examine The Engine Compartment

Examining the engine compartment involves assessing the condition of various components. These include:

  • Fluids–Check the oil and power steering fluid levels using a dipstick to ensure all fluids, including oil and coolant, are at the proper levels. Inspect hoses and reservoirs for leaks, and look beneath the truck for any fluid stains, which could indicate leaks of fuel, oil, coolant, or brake fluid.


  • Belts–thoroughly inspect all belts for pumps, alternators, and compressors to ensure they have no cracks or frays. Also, confirm they’re in place, giving no more than half an inch of play.

Other components to pay close attention to and ensure they’re securely mounted and in excellent condition inside the engine compartment include:

  • Air compressor
  • Radiator
  • Alternator
  • All pumps, including the water pump and power steering pumps
  • Wiring

Step 2: Inspect the Front Parts of Your Commercial Vehicle

Front-of-vehicle inspection checklist items often include checking parts of your steering equipment, such as:

  • Steering box–check the steering box to ensure it is intact. All connected hoses must be properly mounted without any power steering fluid leaks.
  • Steering column or steering shaft–this should be straight.
  • Drag link–check whether the rubber is well-greased and uncracked.
  • Tie rod plus control arms–both must be straight.
  • Pitman arm–confirm if all the caste nuts and cotter pins are present and secure

Step 3: Check The Front Suspension Systems

This includes examining the following parts:

  • Spring mounts and hangers–ensure the spring mounts hold all spring hangers securely in position. Look for signs of cracks, wear, or breakage that might compromise their performance.
  • Shock absorbers–check for splits, leaks, or dry rot within the rubber. Focus more on the sections where the top and bottom parts overlap because most leaks occur here.
  • U-bolts–confirm if all bolts are secure and tightened around the springs and axle.

pre trip inspect

Step 4: Inspect the Brake System

Your commercial vehicle’s brake system is one of its most essential parts. Take your time to examine the entire brake system and perform several brake tests as outlined below:

  • Brake linings and pads–the brake pad’s minimum thickness should be a quarter of an inch. Also, examine the linings for any debris.
  • Air brake hose–ensure the line is properly connected and has no cuts or splits. You also want to confirm there is no air leak from the hose.
  • Brake chamber–the brake chamber must be sealed completely. There shouldn’t be any audible air leaks.
  • Brake drum–look at the color of the brake drum. If blue, it indicates excessive heat and might need further scrutiny.
  • Hand brake–your system’s push rod should have an inch of play (not more) on either side and stand at 90 degrees when pulled.

You may need to perform a 9-, 7-, or 5-step brake test to inspect all brake components accurately.

Step 5: Examine the Lights and Reflectors

Inspect your lights and reflectors to ensure they’re all in perfect working condition and are clear of debris. The pre-trip inspection checklist items you’ll have to go through here include:

  • High and low beams
  • Brake lights
  • Turn signals
  • 4-way emergency flasher function
  • License plate lights and running lights
  • Reflector and DOT tape–ensure these are clean

Step 6: Inspect the Mirrors and Windshield

For this step, be keen to check the following:

  • External mirrors plus mirror brackets–confirm if all external mirrors are clean and do not have any cracks or obstructions. They should also be attached to their mirror brackets firmly and well-adjusted to provide a proper rear view.


  • Windshield–there shouldn’t be any cracks more than one inch. Also, run your windshield wipers to ensure they work and check that you have adequate windshield washer fluid.

pretrip

Step 7: Conduct A Battery and Trailer Coupling System Check

This step involves inspecting the fuel tank, battery area, and trailer coupling system.

Ensure the battery is properly charged and that all key components, such as the exhaust system, suspension, electrical connections, and coupling mechanisms, are secure, undamaged, and free of leaks. Check that everything is in good working order before continuing.

Step 8: Check the Wheels and Tires

To perform wheel and tire inspections properly, check the inflation levels and examine the overall tire condition, particularly tread depth. Some of the most important sections you must pay attention to closely are:

  • Driver and steer tires–ensure the tire tread is even, and the minimum tread depth on drive tires is 2/32”, while that of steering axle tires is 4/32”. The treads and sidewalls shouldn’t have cracks, bulges, or abrasions.
  • Axle seals and hub seal–the axle seal and hub seal should be intact with no leaks
  • Wheel rims–there shouldn’t be any illegal welds or unauthorized repairs on the rims.
  • Dual spacing–ensure there’s enough space between any dual tires
  • Lug nuts and bolts–these components should be intact in their lug bolt holes.
  • Valve stem–confirm there are no audible air leaks in the valve stem.

Step 9: Inspect the Trailer

Inspect the trailer to ensure all key components, such as the headboard, doors, and mud flaps, are structurally sound and securely mounted. Check for any signs of damage, such as cracks, holes, bends, or missing parts, and ensure everything is intact and functioning properly.

Step 10: In-cab Inspection

Ensure all in-cab components are undamaged and functioning properly. This includes checking the steering wheel, seat belts, pedals, gauges, horns, fuse box, parking brake, heater, and defroster to confirm they are all in working order.

Step 11: Inspect the Rear of the Vehicle

Before connecting your truck to the trailer, inspect the rear end to ensure the brake chambers are undamaged, shocks and airbags are intact, and the driveshaft is clean, with no debris in the U-joints. Verify that the frame is sturdy, the fifth wheel is well-greased, and the fuel tanks are free of leaks.

Step 12: Check the Emergency Kit

Truck drivers must carry an emergency kit as required by DOT regulations, including a fire extinguisher, warning devices, and spare fuses. During your pre-trip inspection, confirm the kit is complete and functional, including items like warning flags, reflective triangles, a safety vest, first-aid kit, jumper cables, a flashlight, strobe lights, and extra batteries.

How often should I perform a pre-trip inspection?

According to FMCSA’s current regulations, all truck drivers must perform and log in at least one thorough inspection in their hours of service daily. The pre-trip inspection should happen before each haul. You must also complete an inspection report if you find any defects during your inspection.

Final Thoughts

Thorough pre-trip inspections and regular truck maintenance significantly reduce road accidents and enhance safety. By following the provided checklists, you can ensure your pre-trip inspections meet legal requirements.

For additional safety tips and to further improve your practices as a commercial truck driver, visit our blog. If you find defects that need immediate repair during your inspections, reach out to us for financing options. We offer affordable commercial truck repair loans to help you keep your truck in excellent condition without disrupting your business’s cash flow.


Archives

Sign Me Up!

Stay up to date with the latest news in the commercial trucking industry.

Contact Us
close slider