Office: (404) 975-4800

Uncategorized

Trailer Interchange Coverage Explained

Trailer Interchange Coverage Explained

pexels-markie-mad-336302786-14005602

In the trucking industry, it’s standard practice for companies to haul trailers they don’t own. Whether you’re an independent operator or part of a larger fleet, handling non-owned trailers comes with unique risks. If a trailer in your care is damaged, trailer interchange coverage can protect you by covering repair costs and preventing disruptions to your cash flow.

But what exactly is trailer interchange coverage, and do you need it? In this guide, we’ll explain the essentials of trailer interchange insurance and why it’s a critical safeguard for your trucking business.

What is Trailer Interchange Coverage

Trailer interchange coverage is a specialized commercial trucking insurance that protects against physical damage to non-owned trailers or shipping containers in your custody, whether attached to your vehicle or not. It also extends to trailers you own temporarily in another party’s possession, provided there’s a signed trailer interchange agreement.

Similar to commercial truck cargo insurance, it shields your business from liability for various types of physical damage, including:

  • Collisions
  • Theft
  • Fire
  • Vandalism
  • Explosions
  • Natural events, such as floods and lightning
  • Cargo shifts that lead to damages
  • Damages when loading and unloading freight, and more.

Who Needs Trailer Interchange Insurance?

Trailer interchange insurance is crucial for businesses using non-owned trailers, such as independent truckers, freight forwarders, intermodal operators, and leasing companies.

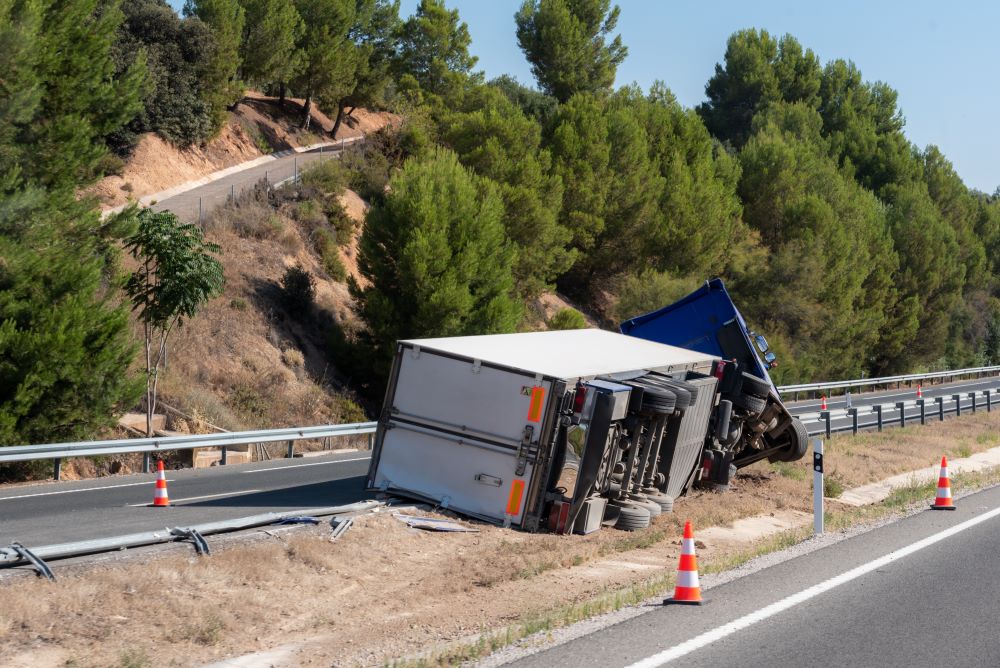
It helps protect your cash flow by covering damage to trailers under your care, eliminating the need for out-of-pocket expenses. In these arrangements, the trucker in possession of the trailer is responsible for any damages incurred during transit.
trailer insurance 2

How Trailer Interchange Agreements Work

A trailer interchange insurance policy requires a signed agreement, a formal contract that enables motor carriers to transfer trailers and complete shipments efficiently. The agreement ensures each party assumes responsibility for trailer damage while the trailer is in their possession, even if they don’t own it.

These agreements make long-distance, multi-carrier deliveries faster, safer, and more economical. For instance, instead of one trucker driving 50+ hours from Seattle to Miami, multiple carriers can share responsibility under the agreement. Each carrier is accountable for the trailer’s condition while it’s in their control, streamlining operations and defining clear roles in the contract.

Elements of a Trailer Interchange Agreement

There are three fundamental elements of a written trailer interchange agreement. These define the roles and responsibilities of participating parties:

  • The duration and terms. Agreements can be made for one consignment, closing once the goods get delivered. Or, they might be standing or evergreen, covering recurring transfers for several trailers.
  • Each party’s obligations. This clarifies the maintenance responsibilities and return of the trailer.
  • Insurance and licensing requirements.

Requirements for Trailer Interchange Insurance Coverage

Besides the basic insurance filing requirements outlined by the Federal Motor Carrier Safety Administration (FMCSA), you need the following to qualify for trailer interchange insurance coverage:

  • A signed copy of the Trailer Interchange Agreement outlining all contractual obligations
  • Accurate trailer valuations
  • Regulatory compliance with specific state insurance regulations
  • Liability insurance. The trailer owner needs to have liability coverage for cargo damages or theft.
  • Number of trailers. You must have at least one trailer(whether you own it or not) insured for every pickup or trailer.

Limits, Deductibles, and Other Coverage Details

When selecting a trailer interchange insurance policy, it’s essential to consider your policy limits and deductibles. The policy limit is the maximum amount your insurer will cover for trailer damage while it’s in your care. The deductible is the out-of-pocket amount you agree to pay toward repair or replacement costs.

trailer interchange 2

For example, with a $35,000 policy limit and a $2,000 deductible, if a trailer under your care is damaged, you would pay $2,000, and your insurer would cover the remaining $33,000.

However, trailer interchange coverage has certain exclusions. It does not cover:

  • Bodily injury
  • Third-party property damage
  • Personal use of a rented trailer
  • Damage occurring without cargo

Understanding these limitations ensures you’re fully prepared and appropriately insured.

Non-Owned Trailer Coverage vs. Trailer Interchange Insurance

Understanding the difference between non-owned trailer coverage and trailer interchange insurance is essential for choosing the right protection.

Both cover physical damage to trailers you don’t own, but trailer interchange insurance requires a written agreement and applies to trailers whether attached, in storage, loaded, or parked. Non-owned trailer coverage, however, only applies when the trailer is attached to your tractor and doesn’t require an agreement.

Non-owned trailer insurance also covers situations trailer interchange insurance doesn’t, such as third-party property damage, bodily injury, or personal use of borrowed trailers.

Having both policies is often beneficial, as they complement each other. For example, if an accident damages a trailer and causes injuries or property damage, non-owned trailer coverage would address claims beyond the trailer, protecting your business from major financial loss.

Challenges and Special Considerations in Trailer Interchange Insurance

Many shippers own, store, and control their trailers but don’t wish to get involved in the trucking business. Instead, they hire transportation services to transport their freight to its final destination under a power-only agreement.

A power-only agreement is a legal arrangement between a shipping company and a motor carrier, where the carrier provides a driver and tractor but not the trailer. Since the carrier will be handling a trailer owned by another company, most insurers offer special considerations for these arrangements and provide trailer interchange insurance or non-owned coverage options.

trailer interchange 5

You must understand these considerations to ensure you get the right coverage for the type of trucking operations you’re involved in. Also, be keen to investigate the premiums and deductibles insurers offer. Most companies will set high deductibles and premiums to manage the risks of trailer exchanges.

How Much Does Trailer Interchange Insurance Cost?

Several factors determine the amount you’ll pay for trailer interchange insurance in the same way they influence the cost of other commercial truck insurance coverage options. Some of these include:

  • Coverage limits. Higher insurance limits will give you more protection but increase your monthly or annual premiums.
  • Deductibles. High deductibles generally lower your insurance costs and increase out-of-pocket payments during claims.
  • Trailer value. Trailers with a higher value increase the potential insurance payout, which leads to higher insurance costs.
  • Location. High-risk areas, such as regions with high theft rates or those prone to harsh weather may fetch higher premiums.
  • Type of freight. Moving hazardous goods or those with high value can increase insurance costs.
  • Claim history. Many claims can increase your premiums because of perceived higher risk.
  • Frequency of use. Frequent trailer exchanges or use increases the risk of accidents, which can raise premiums.

You can expect to pay $1,000 to $1,500 annually for trailer interchange insurance limits ranging from $20,000 to $30,000.

Final Thoughts

Trailer interchange coverage safeguards your business and finances when using non-owned trailers. However, the insurer’s payout is capped at the trailer’s value at the time of loss, so over-insuring wastes money, while under-insuring could leave you with significant out-of-pocket costs.

To avoid these pitfalls, research thoroughly and choose an insurer offering high-quality policies with appropriate limits at competitive rates. Here are some tips to find cost-effective coverage without sacrificing quality.

For more tips on navigating commercial trucking insurance, visit the Mission Financial Services blog. We’ve prepared several guides to help you protect your business adequately and thrive.

DOT 1

DOT Physical Exam: A Complete Guide 

DOT 1

A DOT Physical exam is an essential medical examination for commercial drivers to ensure they are physically and mentally fit to operate large vehicles safely.

Regulated by the Federal Motor Carrier Safety Administration (FMCSA), these exams are crucial for maintaining road safety for drivers and the public.

So what does a DOT physical consist of? In this article, we’ll explore what a DOT physical involves, who needs it, how to prepare, and what could cause a driver to fail.

What Is a DOT Physical?

A Department of Transportation (DOT) physical is a health check that ensures commercial drivers meet the physical and mental demands to operate large vehicles safely. These exams are required by law and assess your physical and mental readiness to drive a commercial motor vehicle.

DOT physicals are regulated by the Federal Motor Carrier Safety Administration (FMCSA). They help protect drivers and the public by reducing risks associated with medical issues behind the wheel. It’s about more than passing—it’s about safety for everyone.

Who Needs a DOT Physical Exam?

You need a DOT physical exam if you:

  • Passenger Transport: If your vehicle is designed to carry more than 15 passengers, or if you’re paid to transport 15 or more passengers, a DOT physical ensures you can safely manage the added responsibility of passenger safety.
  • Heavy Vehicles: Drivers of vehicles with a gross vehicle weight rating (GVWR) or gross combination weight rating (GCWR) exceeding 10,000 pounds in interstate commerce must be medically certified to handle the challenges of operating such large and heavy machinery.
  • Hazardous Materials: If you transport hazardous materials requiring placarding under federal regulations, a DOT physical ensures you are medically qualified to handle the additional risks associated with hazardous cargo.

DOT 2

What Does This Exam Consist Of?

A DOT physical exam consists of thorough health evaluations to confirm a driver’s fitness for operating commercial vehicles safely. A certified medical examiner will review your medical history and conduct several assessments, including:

  • Physical Examination: Your height, weight, blood pressure, and pulse will be measured, and blood sugar levels may be checked. The examiner will assess your general physical condition, looking for any conditions that might impair your driving ability.
  • Vision Test: Drivers must have at least 20/40 vision in each eye, with or without corrective lenses. Peripheral vision is also evaluated to ensure you can monitor your surroundings effectively.
  • Hearing Test: The ability to detect a forced whisper at 5 feet, with or without a hearing aid, is required. This ensures drivers can respond to important auditory cues.
  • Urine Test: Urinalysis screens for illegal substances and can reveal conditions like diabetes or kidney issues that might need further attention.
  • Blood Pressure Check: Blood pressure must meet FMCSA standards. Untreated or poorly controlled hypertension could result in disqualification or shorter certification periods.
  • Additional Tests: Depending on your medical history or symptoms, the examiner might suggest specialized tests, such as an EKG to monitor heart function or sleep apnea testing for those at risk of fatigue-related conditions.

These evaluations collectively ensure drivers can meet the physical and mental demands of commercial driving, prioritizing safety for both drivers and others on the road.

dot 3

How Do I Prepare for a DOT Physical?

Before your scheduled DOT medical exam, you can prepare by gathering all the required documentation and improving your health in different ways. A few steps to take include:

  • Compile your medical history. This includes detailed medical records about any health problems, your past diagnoses, surgeries or procedures, and any medications you might be taking. You can access your medical data through electronic health records. Or, by calling your primary healthcare provider and requesting the info.
  • Prepare Documentation: Gather the necessary forms and documentation in good time. Download the medical examination report forms from the Department of Transportation website, and complete the health history section before your appointment.
  • Avoid Heavy Drinking and Substance Abuse: Alcohol and drug use can impact your test results, particularly in the urine screen and overall health evaluation. Abstain well in advance of your appointment to ensure compliance.
  • Stay Hydrated: Proper hydration is essential for the urine test. Drinking sufficient water before your exam helps ensure accurate results and can prevent delays caused by dehydration.
  • Watch Your Diet: Avoid salty, sugary, or processed foods that can elevate your blood pressure or blood sugar levels. Opt for balanced meals rich in fruits, vegetables, lean proteins, and whole grains in the days leading up to your test.
  • Maintain a Healthy Weight: Obesity can contribute to conditions like hypertension and sleep apnea, which may affect your exam results. Regular exercise and a nutritious diet can help manage weight and improve overall health.
  • Prioritize Sleep: Lack of sleep can elevate stress, blood pressure, and other markers that may negatively impact your test. Aim for at least 7-8 hours of quality sleep the night before your appointment to feel rested and prepared.

What Will Make You Fail a DOT Physical?

The Federal Motor Carrier Safety Administration (FMCSA) has clear guidelines for medical conditions and scenarios that can disqualify someone from passing a DOT physical. Authorities refer to these conditions as DOT disqualifying medical conditions. They are in place to ensure drivers can safely operate commercial vehicles without posing risks to themselves or others. Common disqualifying conditions include:

  • Loss of Consciousness: Any medical issue, such as epilepsy or uncontrolled diabetes, that could cause fainting, seizures, or sudden incapacitation while driving is a serious safety risk.
  • Inadequate Vision or Hearing: Commercial drivers must meet minimum vision (20/40 acuity) and hearing requirements. Conditions like severe cataracts, untreated glaucoma, or significant hearing loss may result in disqualification unless corrected.
  • Compromised Nervous System: Neurological disorders like Parkinson’s disease, multiple sclerosis, or strokes can impair motor skills and reaction times, making it unsafe to drive.
  • Physical Limitations: Conditions such as severe arthritis, amputation (without proper prosthetics), or mobility issues that hinder your ability to steer, brake, or respond quickly in emergencies may lead to disqualification.

DOT 4

Common DOT-disqualifying medical conditions

  • Uncontrolled high blood pressure. High blood pressure exceeding levels specified by the DOT can lead to medical emergencies that may occur when you’re on the road, placing you at risk of causing fatal road accidents.
  • Severe respiratory issues. The same is true for certain respiratory diseases. Say you’re receiving oxygen therapy. This is disqualifying due to the risk of the oxygen equipment malfunctioning or exploding on the road.
  • Vision and hearing issues that can’t be corrected. Commercial drivers unable to meet the minimum visual acuity and hearing requirements will likely find it challenging to distinguish the colors of traffic signals or respond to changing road situations.
  • Uncontrolled Diabetes and other chronic conditions. Severe diabetes and other chronic illnesses can lead to loss of consciousness, compromising your safety on the road. However, you can pass the tests if you have stable insulin regimens and the situation is controllable. If this is the case, you’ll have to get your treating clinician to fill in the new dot physical Form MCSA – 5870 and take it to your medical examiner with your recent Hemoglobin AIC tests.
  • Alcohol and drug use. Drugs and alcohol induce drowsiness. They might make you lose focus and sleep behind the wheel. You need to pass the drug test to confirm you can stay alert and keep your eyes on the road, especially when hauling goods over long distances.

What Happens After the DOT Physical?

After the DOT physical, your licensed medical examiner will give you the DOT physical exam results and explain the next steps.

You may have to visit other trained medical personnel for further testing, specialized treatment, or paperwork if there’s a medical issue, like obstructive sleep apnea or very high blood pressure, that needs attention. In such a scenario, you’ll qualify for your medical examiner’s certificate once the issue is treated.

dot 5

In other cases, you’ll get disqualified and fail to receive medical clearance to continue driving. You can, however, seek re-certification after some time if you resolve the DOT-disqualifying medical condition, or apply for an exemption from FMCSA. Your provider will explain everything you need to know and answer any questions if this happens.

On average, the law requires you to get a DOT physical after every 2 years to remain qualified to operate commercial motor vehicles. But if your medical history reveals a manageable health condition, you’ll need to take the tests more frequently to stay on the road.

Conclusion

A DOT physical examination can be stressful because the outcome can affect your trucking career. But remember, the entire process is mandatory to promote your health and overall road safety.

It’s essential to stay updated on your state’s medical requirements if you’re an intrastate truck driver, as these often differ from federal regulations and may change from time to time.

If you’ve passed your physical exam and are looking to purchase your first truck to begin your career as an owner-operator, reach out to us. We provide customized commercial vehicle loans and can help you get started on the right financial footing.


cost per mile

How to Calculate Cost Per Mile for Commercial Trucking 

cost per mile

If you’re an owner-operator or fleet manager, knowing how to calculate cost per mile for commercial trucking is crucial for maintaining profitability. Accurately calculating this metric gives you clear insight into your operating costs, helping you make smarter decisions, prevent losses, and grow your profit margins. Without this knowledge, you risk jeopardizing your business’s financial health.

In this article, we’ll explain why understanding your cost per mile is essential for effective business planning and provide a step-by-step guide on how to calculate it. This information will empower you to keep your cash flow steady and ensure long-term success for your trucking business.

Why It’s Important to Know Your Cost Per Mile

Calculating cost per mile gives you the data you require to plan and manage your business’s finances effectively. Specifically, it helps with the following:

  • Profitability and Pricing: When you understand your cost per mile, you can figure out how much you need to charge to make a profit and set your rates appropriately.
  • Budgeting and Forecasting: Knowing your cost per mile lets you accurately track operating expenses like fuel, meals, and lodging, helping you pinpoint areas to cut costs and save. This insight also allows you to allocate budgets effectively as your business grows, ultimately boosting profit margins.
  • Decision-Making for Fleet Operations: Analyzing cost per mile helps you make informed decisions on load selection, route optimization, and mileage reduction, ensuring that each delivery is profitable and maximizes revenue.

cost per mile 2

Breaking Down Cost Per Mile: What You Need to Know

To calculate your cost per mile, you must understand a few fundamental business metrics. These include:

Fixed costs

Your fixed costs are the unchanging expenses your trucking business incurs each month. These costs remain the same regardless of the number of loads you transport or miles you drive. Common examples include:

  • Truck and insurance payments
  • Truck payments (financing)
  • License plates
  • Rent
  • Salaries
  • Annual permits and licenses

Variable Costs

Unlike fixed costs, variable costs change monthly according to the number of loads and miles driven. The more loads and miles you cover, the higher your variable expenses will be. Some of the most common examples of these costs include:

  • Fuel costs
  • Maintenance costs
  • Utilities
  • Tolls
  • Tires
  • Food
  • Unloading fees
  • Freight-related fees (broker, dispatching services, etc.)
  • Miscellaneous expenses

Miles Driven

There are two types of miles to track when calculating cost per mile – compensated and deadhead or empty miles. Compensated miles are the miles you cover when you’re on your way to make a delivery.

Deadhead or empty miles are the miles traveled after completing delivery, and your truck is empty. You’ll have to track both miles to estimate your per-mile expenditure accurately.

How to Calculate Cost Per Mile

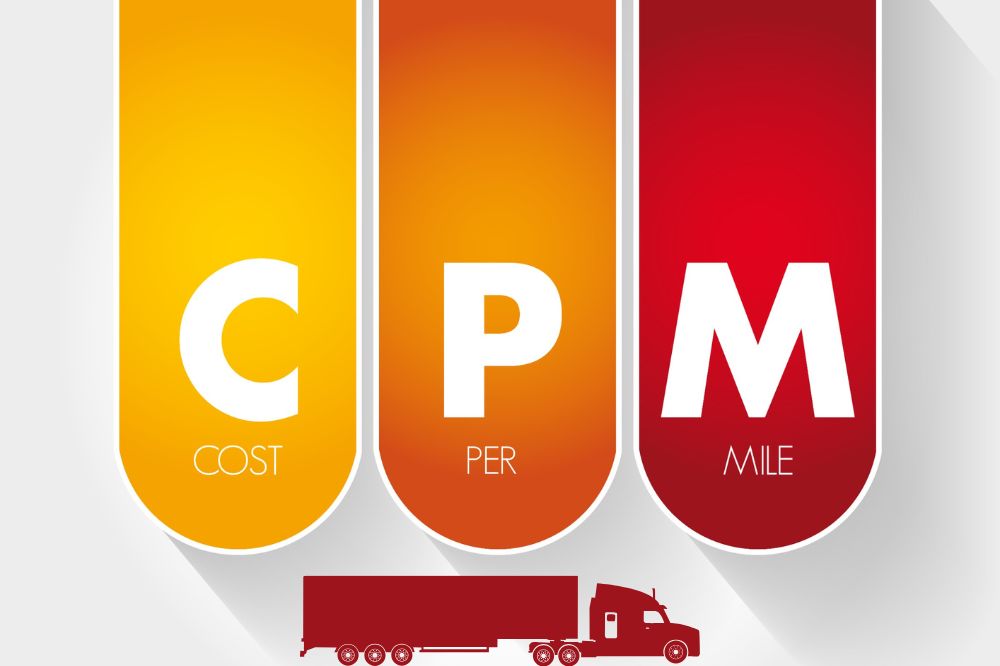
To get your cost per mile, divide your total expenses by the total number of miles driven, i.e.,

Cost per mile = Total expenses ÷ Total miles

Here’s a step-by-step guide showing you how to apply the formula above:

Step 1: Select a time frame for Making Your Calculations

The first step to making reliable cost-per-mile calculations is to choose a time-frame for computation. This will guide your data collection process and minimize confusion.

If you’re working out your cost per mile for the first time, it’s best to pick a shorter time-frame, say a day or week, so you’ll have less data to work with and fewer figures to compute. If not, select an extended period, preferably aligning with how often you track other business metrics. It could be monthly, quarterly, or semi-annually.

cost per mile3

Step 2: Determine Your Fixed Costs

After selecting your time-frame, track fixed expenses within that period by creating a spreadsheet listing each item. Add up these fixed costs for your chosen period to get an accurate total.

Remember that some expenses, like license plates, may be paid annually. If you’re calculating monthly costs, divide any annual expenses by 12. For example, if your yearly license plate fee is $1200, this would equal $100 per month.

Fixed costs provide a stable base for budgeting and financial planning since they remain constant. Accuracy here is key to setting reliable budgets and making precise forecasts.

Finally, review your fixed costs, such as commercial insurance or license fees, each time they renew, as these amounts can vary.

Step 3: Determine Your Variable Costs

After determining your fixed costs, work out your variable costs for the chosen time-frame. Because these costs differ significantly from one month to the next, the best way to record them is to create a column for variable costs on your spreadsheet. Then, use receipts to list all the variable expenses for a given month.

You could also use other tools, such as a fuel cost estimator, to get accurate estimates for your fuel costs if you don’t have all receipts handy. Once you record all variable costs, sum them up to get the month’s total variable expenses.

Track and monitor your variable costs as accurately as possible. It will help you identify ways to improve your business processes, cut costs, and increase revenue.

Following the example above, it’s clear that fuel and broker fees are the highest variable costs. If you introduce fuel efficiency strategies into your trucking business and work to replace brokers with regular clients, you’ll significantly reduce your variable costs and increase your profits.

cost per mile4

Step 4: Track the Total Miles Driven

You cannot calculate the amount you spend per mile without knowing the miles you’ve traveled during the chosen time-frame. Knowing how many compensated and deadhead miles you’ve covered in a month is straightforward if you have electronic logging devices (ELDs), or other software to help you keep track of mileage.

If you don’t have any systems, you can work out your total mileage manually by checking your odometer readings at the start and end of the month. For instance, your odometer may read 70,000 miles at the beginning of the month and 80,000 miles at the end. That means you covered 10,000 miles that month.

Step 5: Calculate Your Cost Per Mile

To work out your cost per mile, add up your total fixed and variable costs. Then, divide the total cost by the number of miles driven.

In our case, the total expenses will be—$2900 + $6530 = $9430 (I.e., the fixed costs under step 2 plus the variable costs under step 3).

The cost per mile is $0.943. That is the total expenses ($9430) ÷ the miles driven under step 4 (10,000).

Conclusion

Calculating cost per mile will help you evaluate your business’s financial health. It can also guide you to the correct business moves and make the most of your career in the trucking industry. You’ll know what to do, where, and how to keep your business costs low and profits high.

For example, when tracking your mileage, you can know the number of deadhead miles you cover and look for ways to minimize them. And because deadheading still uses fuel – the second-largest operating cost of trucking businesses – reducing dead miles will help you reduce fuel consumption, helping you to save and keep more money.

Our guide above will help you get your cost per mile in no time, but if you prefer a simpler method, consider using an online cost-per-mile calculator. For more tips you can follow to ensure your trucking business thrives, visit our blog.

hotshot 1

Ultimate Guide To Hot Shot Trucking

hotshot 1

Hot shot trucking is rapidly gaining popularity in the trucking industry, appealing to drivers who want to be their own bosses and providing customers with fast, reliable delivery options. In this ultimate guide to hot shot trucking, we’ll explore why this sector has become a go-to solution for urgent, time-sensitive deliveries and how it helps businesses tackle unexpected supply chain needs.

Whether you’re a truck driver ready to take on an owner-operator role for more freedom or a newcomer to the industry, this guide will cover everything you need to know about hot shot trucking, including its pros and cons and the steps to start your journey as a hot shot driver.

What Is Hot Shot Trucking?

Hot shot trucking involves the pick-up and delivery of time-sensitive loads to easily accessible locations, distinguishing it from semi-trucking, where drivers transport large loads for extended periods in class 8 tractor-trailers.

Hot shot drivers typically use medium-duty trucks, such as pickups with flatbed trailers or straight trucks, to quickly deliver cargo. They often haul construction and agricultural equipment, LTL items, and machinery for various industries, including oil and gas.

The Importance of Time in Hot Shot Delivery

Because hot shot shipping focuses on delivering urgent loads, the time taken to fulfill deliveries is crucial. Ideally, the less time a hotshot driver takes to move freight, the more efficient the service is.

Such fast delivery services come in handy in emergencies and various situations, including:

  • Transporting medical implants, live human organs, and specimens.
  • Moving industrial parts required to replace faulty components in manufacturing plants to avoid factory downtime
  • Moving agricultural loads, including livestock or perishable goods

How Hot Shot Trucking Benefits Shippers

Hot shot trucking is the preferred transportation service for businesses and individuals who need to move time-sensitive loads because it offers several benefits:

  • Increased speed. Hotshot trucks are smaller and lighter, enabling fast transportation and increasing customer satisfaction as goods get delivered on time.


  • Enhanced flexibility. Thanks to their size, vehicles used in hot shot trucking can maneuver busy routes and tight spaces, which are often inaccessible to larger trucks.

hotshot2

  • Cost-effectiveness. Hot shot trucking can reduce standard shipping costs by delivering the required supplies without booking and paying for an entire semi-trailer. Hot shot truck drivers also spend less time on the road, and this can reduce costs by half or more.


  • Increased pool of trucking solutions. Hot shot trucking services can handle small loads under 10,000 pounds in half the standard shipping times, filling a gap in optimizing the supply chain sector.

Types of Trucks Used in Hot Shot Haul

The trucks used for hotshot trucking services differ from those used in other freight hauling services. The preferred vehicles for transporting hotshot freight are pickup trucks, which fall under classes 3, 4, and 5 medium-duty non-commercial vehicles by the U.S. Energy Department.

Truck classifications are based on Gross Vehicle Weight Rating (GVWR), which is the maximum truck weight plus its fully loaded weight. Here are some examples of vehicles used in the growing hotshot trucking industry:

  • Class 3 trucks: Medium-duty class 3 pickup trucks have a GVWR of 10,001 to 14,000 pounds. They transport lighter loads and often come fitted with six tires minimum.


  • Class 4 trucks: Class 4 medium-duty vehicles have a GVWR weight limit of 14,001 and 16,000 pounds. They offer more hauling capacity and are used to transport larger hot shot loads.


  • Class 5 trucks: The GVWR weight limit of class 5 pickup trucks ranges from 16,001 to 19,500 pounds. These vehicles are reliable for transporting heavier loads. They also provide versatility for large hauls because you can add a variety of upgrades and towing packages.

Trailer Types Used for Hot Shot Hauls

You’ll need to purchase a trailer as an add-on to your vehicle to perform hotshot trucking jobs since pickup trucks don’t have trailers attached. There are various trailers you can work with, depending on your truck’s capabilities and the type of freight you intend to transport. Some common trailer types used for hot shot hauling include:

hotshot3

Bumper Pull Trailers

These trailers are short, easy to use, and relatively inexpensive. However, they can only transport loads weighing 10,000 pounds or less. Anything above this weight causes them to lose stability. Still, these trucks are popular among new drivers and those working part-time.

Gooseneck Trailers

Gooseneck trailers are more stable and can support heavier loads than bumper pull trailers. They also have a high turning radius and thus offer more maneuverability, especially in tight spots. Because of this, they are the go-to option among professional hotshot trucking drivers even though they fetch higher prices than bumper pull trailers.

Tilt Deck Trailers

Tilt deck trailers can tilt at an angle. This feature reduces heavy lifting when loading cargo. However, it increases the effort needed to maintain the trailer because it uses a hydraulic system that requires regular oil and filter changes.

Lowboy Trailers

Lowboy trailers have a low center of gravity to handle the heaviest hotshot freight. They’re also lower in deck height, making them ideal for carrying oversized or tall equipment up to 12 feet high. But, you can’t transport as much material per trip because its deck space is small.

Dovetail Trailers

Dovetail trailers are popular for transporting cars and wheeled goods due to their angled rear, which facilitates easy loading. However, caution is needed as they protrude and hang low, making it difficult to navigate steep roads without dragging or increasing the risk of rear-end collisions.

hotshot6

Advantages of Hot Shot Trucking

Many drivers looking to become owner-operators or beginners interested in establishing a career in the transport and logistics industry often start with hot shotting because of the following advantages:

  • Low startup and operating costs. The equipment needed is less expensive than that for semi-trucking, and running hotshot operations is more affordable than other freight services. Additionally, commercial truck insurance for hauling various load types is cheaper.


  • Flexible work schedule. Hot shot drivers have a flexible work schedule and spend more time at home because they often transport time-sensitive freight over shorter distances.


  • Good income. The hotshot trucking industry is constantly growing. It provides steady work with good pay (more on this below).


  • It helps build experience. If you’re new to the trucking industry, hot shot trucking will help you understand federal regulations and gain the know-how you need to thrive in transportation.

Disadvantages of Hot Shot Trucking

Consider these challenges before starting in hotshot trucking:

  • Frequent and costly maintenance: High road hours accelerate wear, requiring regular oil changes and repairs. Maintenance and fuel expenses can quickly reduce profits if not well-managed.


  • Intense competition for loads: As an owner-operator, finding well-paying loads is competitive. Building a reputation takes time and patience.


  • Licensing requirements: Obtaining and renewing necessary licenses for time-sensitive hauls can be costly and complex, requiring careful budgeting and planning.

7 Steps to Become a Hot Shot Driver

Becoming a hot shot driver requires fewer qualifications than other trucking services, varying based on whether you work for a company or start your own venture and the types of cargo you’ll haul. Here are the key qualifications and steps to get started in hot shot trucking:

1. Get a Driver’s License or CDL

If you plan to haul loads heavier than 10,000 lbs, you must have a valid class D commercial driver’s license (CDL). It’s the standard CDL for most citizens.

We always recommend all aspiring hotshot truck drivers get a CDL, even though it’s not mandatory for loads under 10,000 lbs. Having a CDL helps you qualify for more jobs because you can take on a variety of loads. It also sets you up to grow your trucking career with ease.

hotshot5

2. Obtain Your Medical Card

The Department of Transportation (DOT) requires all hotshot drivers to pass the DOT medical exam and obtain a medical card. The exam certifies that you’re mentally and physically fit to perform your job. For your medical card to be valid, you must get it from a DOT-certified medical examiner.

3. Commercial Driver’s Insurance

If you’re running your hotshot trucking business as an owner-operator, you’re legally required to get adequate commercial driver’s insurance. The right commercial auto insurance for hot shot truckers covers the unique risks of the service and the special needs of truckers using smaller vehicles for urgent freight deliveries.

A few essential components of an ideal hot shot insurance policy include:

  • Liability coverage
  • Cargo insurance
  • Physical damage coverage
  • Non-trucking liability.

4. Get Your MC Number or Operating Authority

Once you have commercial insurance, get your motor carrier (MC) number from FMCSA. It will give you the legal authority to perform your trucking operations across state lines. To apply, visit FMCSA’s unified registration portal and follow the prompts. Here’s a quick step-by-step guide on registering for operating authority through FMCSA.

5. Register Your Business with the State

Choose a business structure and register your hot shot trucking venture with your state. You’ll get a federal tax ID or an Employer Identification Number (EIN), making your business a distinct legal entity. This step is crucial because it legitimizes your venture, allowing you to open a business bank account and access loans, tax incentives, and other partnership opportunities.

6. Purchase Equipment

You cannot run your operations without a pickup truck and a trailer. Some equipment lets you transport different types of cargo, and others can only haul specific freight types. To purchase the most fitting hotshot trucking equipment, consider the loads you plan to haul, your budget, and your overall business goals.

7. Find Loads & Start Driving

With all the logistics in place, it’s time to search for hot shot loads, fulfill the job, and start getting paid. If you’ve partnered with hotshot trucking companies, they’ll assign you work. If not, you’ll have to look for opportunities on load boards to get started. You can also find lucrative hotshot trucking jobs by networking or working with brokers.

Also, consider partnering with a dispatcher who can scour load boards on your behalf or reach out to their networks and find well-paying opportunities for you.

How Much Do Hot Shot Drivers Make?

On average, hot shot trucking earnings range from $49,000 to $75,000 annually. You can even earn over $100,000 per year. It depends on various factors, such as experience levels, region, types of loads hauled, conditions of the vehicle used, distance of transport, number of trips made, and the time spent deadheading.

Conclusion

Hot shot trucking is a reliable and relatively easy way to enter the transport and logistics industry. The service also comes with a high earning potential, as the demand for fast and specialized movement of time-sensitive loads is constantly growing.

If you decide to become a hotshot trucker and need help purchasing equipment for your operations, contact us. We provide a range of affordable vehicle financing options to help you get the equipment you need to start and grow your venture.

flatbed 3 (2)

How to Secure Loads Safely on Flatbed Trailers

flatbed 3 (2)

Knowing how to secure loads safely on flatbed trailers is essential, as these trailers have open sides and no roof, increasing the risk of cargo shifting or detaching. To prevent accidents, the FMCSA enforces specific cargo securement regulations.
In this guide, we’ll cover essential securement practices and provide tips to ensure safe and successful flatbed hauling.

Proper Load Securement

Proper load securement involves safely restraining cargo to prevent it from shifting or detaching during transit, ensuring the safety of the driver, cargo, and others on the road.

The Importance of Proper Load Securement for Flatbeds

Proper cargo securement for flatbeds is essential for three main reasons:

  1. Unsecured or improperly secured cargo can fall from trucks, creating hazardous conditions and traffic diversions. By the numbers, the National Highway Safety Administration (NHTSA) estimates that over 700 fatalities and 17,000 injuries each year are due to accidents caused by unsecured loads.
  2. Securing cargo the right way protects it from damages and theft during transportation, ensuring the load arrives at its destination in a pristine condition. This minimizes losses for trucking companies since they’re often responsible for cargo damages.
  3. Failing to comply with all federal and state guidelines can disrupt your business operations and affect cash flow.  You might also suffer financial losses from hefty fines due to non-compliance.

Flatbed Strapping Regulations

To succeed as a flatbed truck driver, you must know the Federal Motor Carrier Safety Administration (FMCSA) flatbed strapping regulations and Commercial Vehicle Safety Alliance (CVSA) safety standards. These guidelines ensure secure loading practices and include general rules that apply nationwide.

flatbed 2

  • Choose the right securement equipment: Use straps, chains, or wire ropes based on the cargo’s size, weight, and type. Items that can roll must be stabilized with wedges or chocks.


  • Ensure correct working load limits: The combined working load limit of all securement systems should be at least half the cargo’s weight.


  • Use the proper number of tie-downs: Most loads need at least four, though this may vary by cargo size and weight. Use a securement calculator to determine the exact number needed.


  • Double-checking all connections before departure

FMCSA outlines commodity-specific securement requirements for transporting different types of goods, such as logs, metal coils, steel or concrete beams, heavy equipment, vehicles, and machinery, among others. Here’s a quick breakdown of essential cargo securement regulations you should know.

8 Tips on Securing a Load on a Flatbed

Knowing how to secure loads safely on flatbed trailers can be challenging without the right steps. Here are key factors to ensure cargo is properly secured on commercial freight carriers.

Understand Weight Distribution

Cargo weight and trailer dimensions impact stability. Understanding both helps ensure even load distribution, determine the number of ties needed, and decide their placement for secure transport on flatbed trailers.

Conduct a Pre-Load Inspection

Take some time to inspect your trailer before loading freight. Check for any damages, including loose bolts and nuts. You want to identify any issues that may prevent proper load securement and handle them in good time.

Choose the Correct Equipment

To choose the right equipment, consider two main factors:

  • The size, shape, and weight of the cargo
  • The road and weather conditions you’ll be operating in when moving the load

Use wire ropes or ratchet straps for large loads, as they’re supportive and easy to handle; for rough terrain, chains or cables are better suited. Ratchet straps work well for softer materials like lumber. Always confirm securement equipment meets DOT weight limits, and inspect for damage before each use.

flatbed 3

Position the Cargo

Ensure the trailer is level before loading to prevent uneven weight distribution that could cause tipping. Load from front to back, positioning heavier items near the center to reduce side leverage and evenly distribute the weight across the truck.

Secure the Load

Once the cargo is in position, secure it with ties. FMCSA requires you to use at least one tie-down per ten feet of cargo plus any fraction over ten feet. For instance, you’ll need four tie-downs for a 35-foot-long freight.

Place a Tarp if Necessary

Tarps protect cargo from harsh weather conditions. If driving in bad weather, pick the correct tarp for your needs based on the weather and the type of cargo you transport. Some tarps are designed to cover lumber or steel when it’s rainy, while others protect cargo from the wind.

Ensure the tarp is secure on the trailer and has no wind pockets. If it comes loose and blows away in transit, it can obstruct the view of other motorists, leading to accidents.

The Importance of Double-Checking

Before you get into the cab and start your journey, double-check the freight to ensure it’s secure and all straps are holding as they should.

Stress from tightening straps on the corners of the flatbed trailer can cause cutting and abrasion, making them weaker as you drive. Double-checking helps you identify these issues and take the necessary steps to enhance safety.

Ongoing Monitoring and Adjustment

Some straps, especially those not protected by corner protectors, can give in during transport.  To prevent this, monitor the secured load frequently – after every 50 miles or so – to ensure all goods remain anchored throughout the trip.

flatbed 1

Final Thoughts

The most significant point to keep in mind when securing cargo for transport is that the freight must stay fastened to the floor of the trailer throughout the trip. Different flatbed load securement rules apply to different cargo types and road situations. We’ve outlined how to secure loads safely on flatbed trailers to keep yourself safe, and stay on the right side of the law.

One last tip – assemble and prepare all the tools you’ll need to perform the task correctly before you begin. It will make the procedure smoother and more efficient.

Also, consider exploring commercial truck insurance options for additional cargo protection. So you can conduct your operations with peace of mind. For more tips to help you succeed in your trucking endeavors, visit our blog.

pilot car 1

Pilot Car Services Explained Simply

pilot car 1

Pilot cars play a crucial role in keeping oversized loads safe on the road. From navigating tricky routes to warning other drivers, these vehicles ensure that large transports move smoothly.

Do you need to manage an oversized load? To help you, we’ll break down exactly what pilot car services are, why they’re needed, and how they help protect everyone on the road.

Why Are Pilot Cars Used?

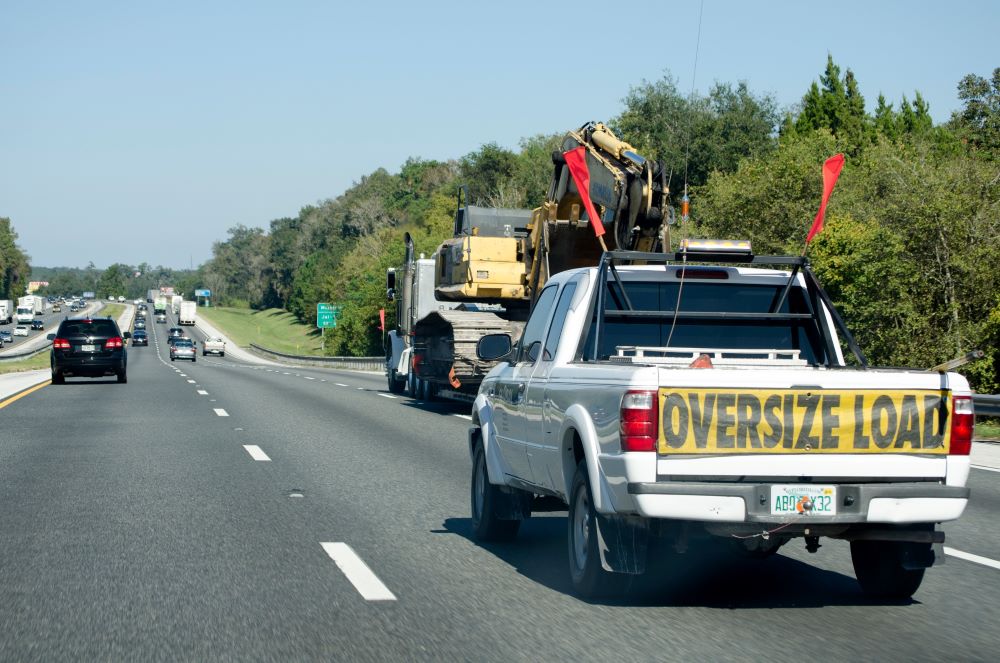
Pilot cars, also called escort vehicle services, are special cars that drive with large trucks carrying oversized loads. These loads might be very wide, tall, or heavy.

When large truck classifications are on the road with loads like construction materials, huge pipes, or heavy equipment, they need extra help. That’s where a pilot car service comes in.

Oversized loads can create safety risks because they’re harder to maneuver and see around. So, the pilot car driver will guide these trucks to make sure they’re safe on the road. They’ll watch for hazards, and help with lane changes or sharp turns.

Pilot Car Driver’s Responsibilities

You can choose from different pilot cars, depending on the load and the specific needs of the trip. Here’s a breakdown of the key roles a pilot car company offers.

Lead Cars vs. Chase Cars

Lead Cars drive in front of the oversized load, guiding it safely along the route. Their main job is to spot potential obstacles, like sharp turns, low bridges, or narrow roads, so the truck driver can navigate smoothly.

Lead car drivers also help ensure the oversized load stays on the right route and keeps pace with traffic safely.

Chase Cars follow behind the oversized load. Their role is to protect the load from behind, assist with lane changes, and ensure no other drivers are in the truck’s blind spots.

pilot car 3 (2)

Chase cars alert the truck driver of approaching traffic and help prevent other vehicles from getting too close, especially during turns or stops.

In some cases, both a lead and a chase car may be required for extra-large or unusually shaped loads. This gives you full coverage of potential hazards from all sides.

Pole Cars

A Pole Car is a lead car used specifically for very tall loads.

This pilot vehicle has a tall pole on top, which is designed to measure the height of any overhead obstacles along the route, like bridges, traffic lights, or power lines.

By driving ahead and checking clearances, the pole car pilot driver ensures that the truck won’t hit any unexpected overhead obstacles, which could cause serious damage or accidents.

State Regulations for Pilot Car Services

Pilot car requirements vary from state to state, and the rules depend on the size and type of the oversized load.

Every state has its own set of guidelines for when an escort car is needed and what equipment it must have.

In California, any load wider than 12 feet requires at least one pilot car. This car must have flags, warning signs, and flashing lights to alert other drivers to the oversized load. In some cases, the pilot car drives in front of the load, while in other cases, it follows behind.

Some loads may require more than one pilot car. For example, if a load is wider than 14 feet, states may require two pilot cars – one leading and one following the truck.

Many states require a height pole car for tall loads. In most states, a pole car is required when a load is taller than 17 feet, but some states, like New York, require one for loads over 14 feet 6 inches.

While most states don’t require pilot car drivers to be certified, some, like Utah, Washington, Florida, and New York, have certification rules.

Pilot cars must also have specific safety equipment, such as flags, lights, cones, and fire extinguishers. Certain states like Pennsylvania also require pilot cars to carry specific insurance.

pilot car 2

In rare cases, oversized loads may need a police escort, especially when the load takes up multiple lanes or requires temporary road closures. Different states have different rules, but these rules apply only to very large loads.

Always check the regulations for each state when transporting an oversized load to ensure you stay compliant and safe.

Pilot Car Equipment

To safely transport oversized loads, pilot cars need specific equipment. Here are the basics:

. Here are the basics:

  • Radio: A two-way radio, like a CB radio, is essential for communication between the pilot car and the truck driver.


  • Height pole: Used by height pole cars, this adjustable pole measures overhead clearances to ensure tall loads can pass under bridges or wires safely.


  • Flags: The pilot car displays bright, typically orange or red, flags to signal other drivers about the oversized load..


  • Signs: A sign that reads “Oversize Load” must be displayed on both the pilot car and the truck.


  • Lights: Flashing amber lights are required to make the pilot car more visible, especially in poor weather or low-light conditions.


  • Safety Gear: Items like reflective vests, fire extinguishers, and cones are also part of the standard equipment to maintain safety during transport.

pilot car 3

Pilot Car Positioning

Pilot car positioning depends on the size and type of the load, as well as the road conditions.

Lead cars drive ahead to scout for road hazards, while chase cars follow behind to manage traffic and help with lane changes. Some loads require both, ensuring safe navigation through tight or challenging routes.

Final Thoughts

Pilot cars are essential for the safe transport of oversized loads, guiding trucks through challenging routes and ensuring road safety. Understanding their role helps you appreciate their value on the road.

If you’re looking for trusted pilot services, a Pilot car directory can help you find the right professionals for the job.

Are you an owner-operator looking to invest in a new commercial vehicle? Then get in touch with us at Mission Financial Services. We make it easy for truck drivers and fleet managers to get the financing they need to purchase their ideal truck.


Archives

Sign Me Up!

Stay up to date with the latest news in the commercial trucking industry.

Contact Us
close slider